

I am captain of the bateau DeSager, a replica 1792, flat-bottomed river craft. Since the bateau was first built and obtained by the Schenectady County Historical Society, I have been gradually fitting it out in a manner to match its looks and provenance. This includes rigging it in natural-fiber lines (mostly abaca), making rope fenders, and providing appropriate cleats, oar leathers, and other accoutrements.
One item that was not correct was the yard. First, the yard was too short. It was only 5 feet across. The boat's beam is as wide. Second, instead of having cleats to secure the braces, parrel, and sail, it had holes drilled through it. I had rigged this provisionally with manila brace lines, parrel, and halyard, but I was not satisfied. Also, Kim had made us a canvas sail. This worked astonishingly well considering that it was a length of 60" wide canvas with some simple earrings and clews made out of cotton clothesline and sewn into just the corners. We had managed to sail around 29 miles under this sail. Unfortunately, we didn't care for the sail very well, and it started to grew mildew over the last winter.
I researched what a period sail and yard should look like. The most valuable book I found was David Steel's The Elements and Practice of Rigging and Seamanship, published in 1794. I consulted a copy on microfilm at the New York State Library. This book contains dimensions for numerous yards and sails, statements on what materials to use, and other valuable and pertinent information. I basically followed Steel's plan forof both the yard and sail in all particulars. As Steel primarily deals with British warships, I followed many of the recommendations for the smallest sail that he discusses in detail, that of a royal mizzen sail.
Two other books of value were Hervey Garrett Smith's The Arts of the Sailor and Emiliano Marino's The Sailmaker's Apprentice. I recommend Smith without reservation to anyone starting out with rope work, knots, and splicing. It is an invaluable aid to the beginner. Marino was principally useful for a drawing of the way to make a cringle. Otherwise, I felt that Steel and Smith generally gave the information as well. Marino would have been more use if I was attempting to make sails for a new design of boat, but that wasn't the case.
My first project was to make a new yard. Steel suggests that, for square-rigged boats, a width equal to 1.6 times the beam of the boat is appropriate. Thus, since the DeSager is 5 feet of beam, the yard is 8 feet long. The diameter suggested for the yard was 2 inches.
I was reluctant to attempt to make a yard entirely from scratch. However, there didn't seem to be any sensible way of procurring an 8 foot long, 2 inch diameter wooden rod (never mind that a perfect rod would not have been optimal). I checked a variety of online catalogs and local wood shops. I would have had to custom order the yard, which appeared prohibitively expensive.
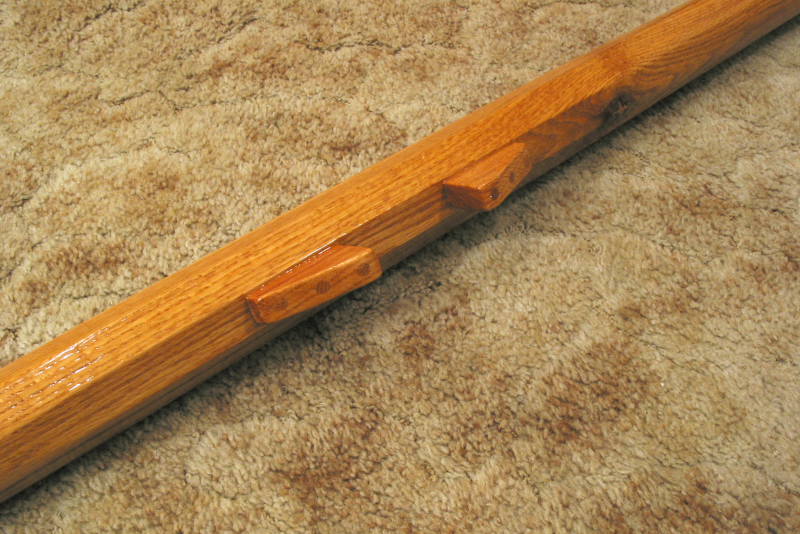
Ultimately, I purchased a 2.5 inch square beam of oak (nominally a 3x3) from a local lumber yard. Although spruce is the preferred wood for a yard, according to Steel, oak was an acceptable alternative (though not second on the list). Steel recommended planing the spar first into an octagon, then planing the ends into rounds. This I did with a small hand plane (a larger plane would have made the task much easier). It turned out to be easier than I feared. It took about 3 hours of work to make the 8 foot beam into an octagon, then another hour to round the ends. As per Steel's recommendation, I left the center quarter (two feet) of the yard octagonal. Although Steel had recommended a 2 inch diameter yard, I settled for the 2.5 inch diameter that the original beam was -- it seemed like far too much effort without much benefit to make the entire thing smaller.
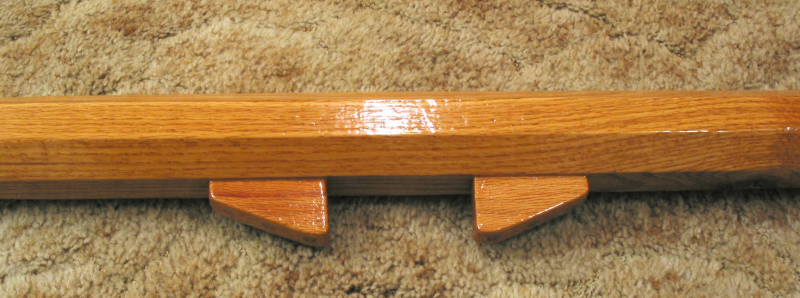
The yard has six cleats on it. Two cleats are at each end to hold the earrings of the sail, with one cleat on the forward side of the yard and one cleat on the aft side. The remaining two cleats are near the center on the forward side of the yard and are used to confine the parrel and halyard to an appropriate location. Steel specified (for this size yard), 3 inch long cleats that were 1.25 inches deep and 0.75 inches thick. The optimal wood is elm, with oak being a second choice. My cleats were made from an oak 1x2. I attached them with treenails (slightly modified dowels), with some hide glue for additional security.
The end cleats are positioned so that their working surfaces are 1/32 of the yard's length away from the end (or 3 inches, in this case). The center cleats are supposed to be twice the yard's diameter apart. I didn't actually find this information until after I was finished the yard -- I made them 3.5 inches apart, which works nicely.
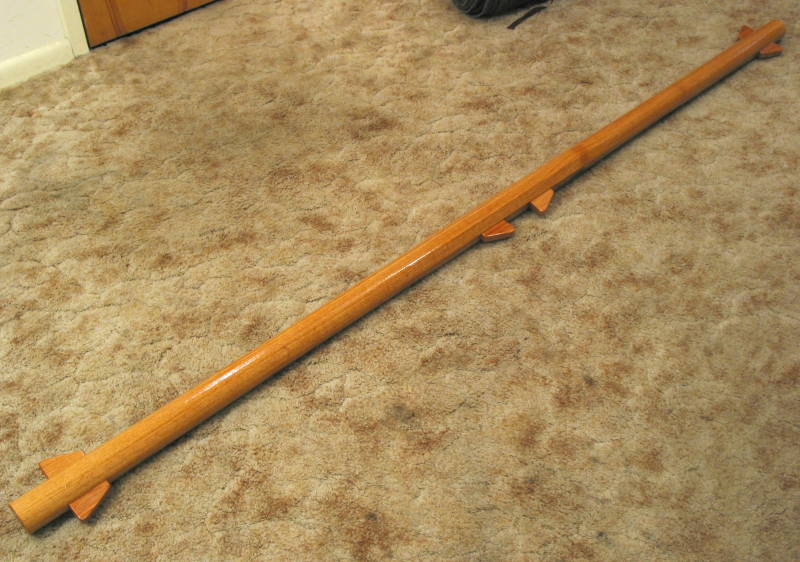
Once made, the yard was given five coats of spar varnish. It turned out fairly well.
Click on a picture for a larger image.
|
|
|
|
|
| The new yard for the bateau | The center cleats, used to hold the parrel and halyard in position | Another view of the center cleats | The center cleats on the center octagon | One set of end cleats on the round part of the yard |
The sail turned out to be a monumental project -- which is why I felt it was worth making up a web page about it.

The first step was to design the sail on paper. Some of the dimensions seemed obvious. The head of the sail needed to be 7/8 the width of the yard. Since the yard is 8 feet wide, the head of the sail is 7 feet. The height of the sail is dictated by the mast of the bateau. Based on the old sail and halyard, I decided that I could make the new sail 8.25 feet in height (it turned out that I could have added another 3 inches or so, since I made a new and better halyard).
The foot of the sail was another matter. It seemed that the sail should be trapezoidal, but Steel was coy on this matter, as the sail didn't fall into the rules for the course of a large ship. I ended up picking 9 feet, which appears to be a good decision.
The corners of the sail require some sort of reinforcing (or at least seem like they should). I chose corner linings that spanned one cloth of the sail and were half a cloth wide in finished dimension (more on the cloth dimensions later).
Lastly, there is a tabling around the edge of the sail. This is another layer of sailcloth that reinforces the edge. Steel specified 2.5 inches wide, though suggested that the top tabling could be 3 inches instead. I made the tabling 2.5 inches on all sides.
In addition to the requisite clews at the bottom corners of the sail, and head cringles (also called earrings) at the top corner of the sail, I decided to add bowline cringles. These are loops at the quarter and halfway points along the lower vertical edges of the sail, and can, at least in theory, be used to pull that edge of the sail forward to allow the boat to sail better in a beam or head wind. The bowline cringles may be pure optimism on my part, but I decided that it would be better to add them and not need them then to lament not having tried them forever more.
I drew up the sail, modifying it until I was satisfied.
My research suggested that a linen canvas would be the optimal sailcloth. Unfortunately, I couldn't find any that was light enough for the size sail I was making. There was some information that suggested a highly calendered cotton canvas would also be acceptable.
In either case, in the 18th century, the canvas would have been tanned after the sail was made. This tanning was done on non-military vessels and on small boats to prevent the sails from mildewing. The tanning compromises the strength of the sail a small amount, increases its weight, and decreases its performance. However, by tanning the sail, the canvas no longer needs to be aired out after every rain storm -- it can be left furled. The navy would have enough manpower to air the sails properly, plus has the need for every possible edge in performance. Small boats and merchantmen would rather have the lower maintenance, and, hence, lower cost, of the tanned sail.
Since our last sail became quite mildewed through our neglect, and since I had no desire to take up tanning as a hobby, I decided to go with a synthetic sailcloth designed to replicate the look of a period sailcloth. Specifically, I chose Oceanus Ship's Cloth made by North Cloth. I purchased 25 meters of the #7 tanbark canvas, which turned out to be just about perfect. So far, the cloth appears fantastically strong. It was pleasant to work with, and has a nice appearance.
Sailcloth comes in narrow widths. Originally, linen sailcloth came in 24 inch wide bolts, while cotton cloth came in 18 inch wide bolts. This was primarily because there needed to be seams in the sail with that frequency to control stretch. The sailcloth I purchased came in 18 inch widths, which, once the seam allowances have been added, means that each length of cloth only adds 16 inches of width to the sail.
Having decided to go with a synthetic sailcloth, I felt that I couldn't in good conscience use a natural fiber bolt rope. I ended up using Spunflex (which used to be called Roblon). I ordered 50 feet of 10 mm rope, which was just enough (I had around 5 feet left over). Compared to manila, I detested working with Spunflex. It has a tendency to unlay when the strands have been separated for splicing. I don't know how this compares to other synthetics, but I would use a traditional tarred hemp if I were to do this again.
For sewing thread, Steel gives a specification. He also lists a different thread weight for the sewing the boltrope. I ended up using some tarred marline, also made from Spunflex, which one of the bateau crew had obtained for me. The marline was 2 mm in diameter and consisted of 3 strands. I separated the strands, and used a single strand for sewing the sail (as this matched the weight of thread that Steel specified), and a doubled thread for the boltrope (Steel specifies 4/3 the weight of the sewing thread for the boltrope thread). Aside from the minor annoyance of separating the strands, this worked fairly well.
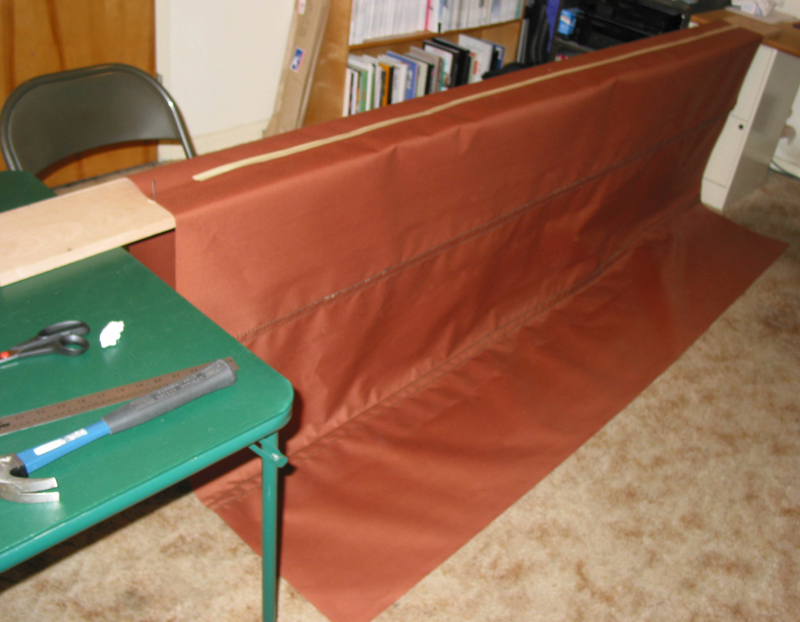
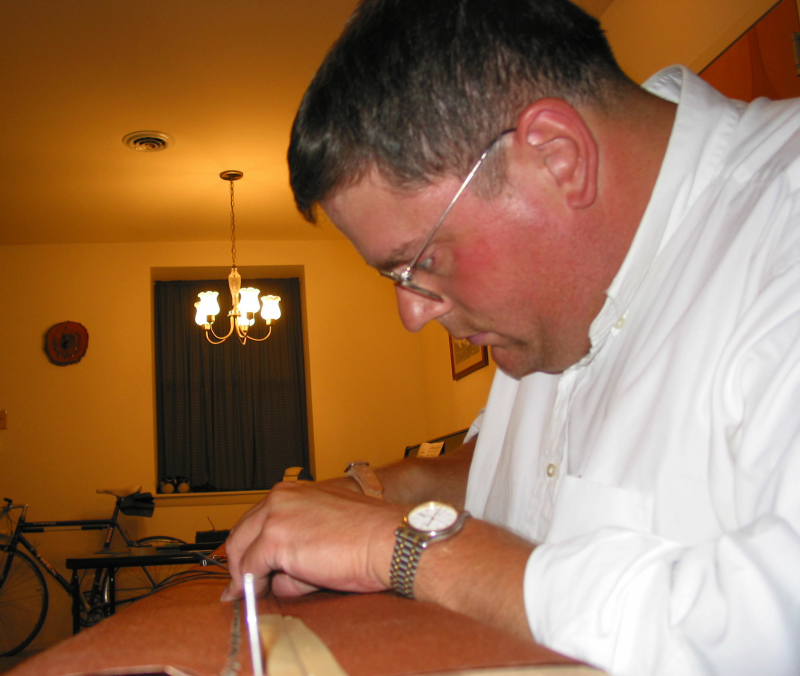
This turned out to be far, far more work than I really wanted to do. My living room is not a very good sail loft, so I laid out a long board as a work surface. This worked adequately. The sewing techniques are those discussed in Smith. When I showed off the sail at a nautical arts event, many people were amazed that I had actually hand-sewn the entire sail.
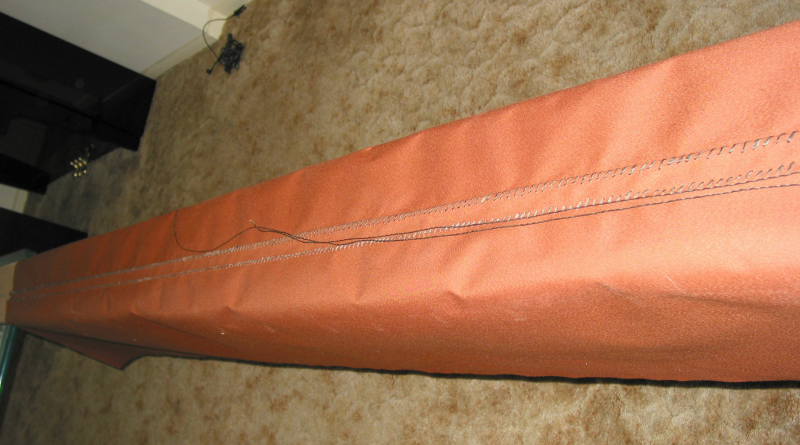
The first step was to sew the panels of sail cloth together, then cut the sail to the final shape plus seam allowances. I left a 1 inch seam allowance on all sides. The overlap between panels is a 1 inch wide flat-felled seam. The seams are sewed at around 3 stitches to the inch, which is what Steel specifies (except that he lists a range for the number of stitches per yard of length).
 |
 |
 |
 |
 |
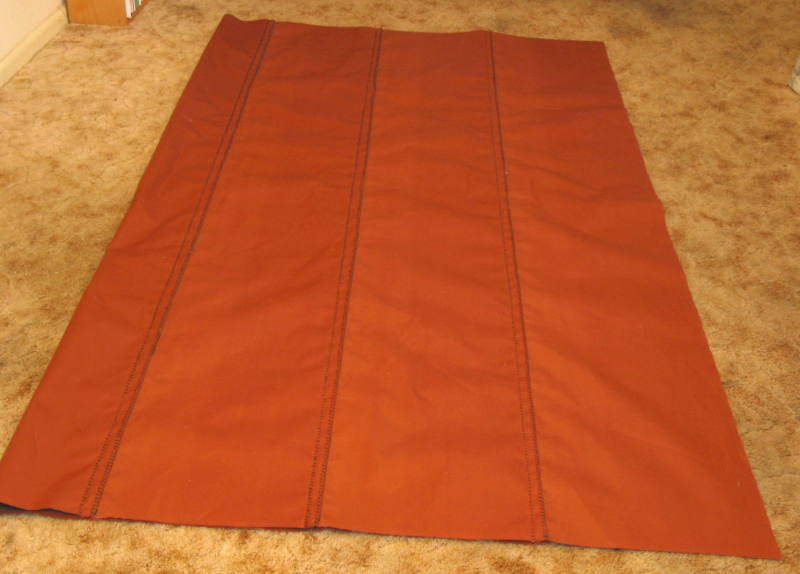
| Attaching the lengths of sailcloth together. There were a total of seven panels of sailcloth. | The improvised 'sail loft' | Me working on the sail | Sail with all seven panels attached, not yet cut | |
 |
 |
 |
||
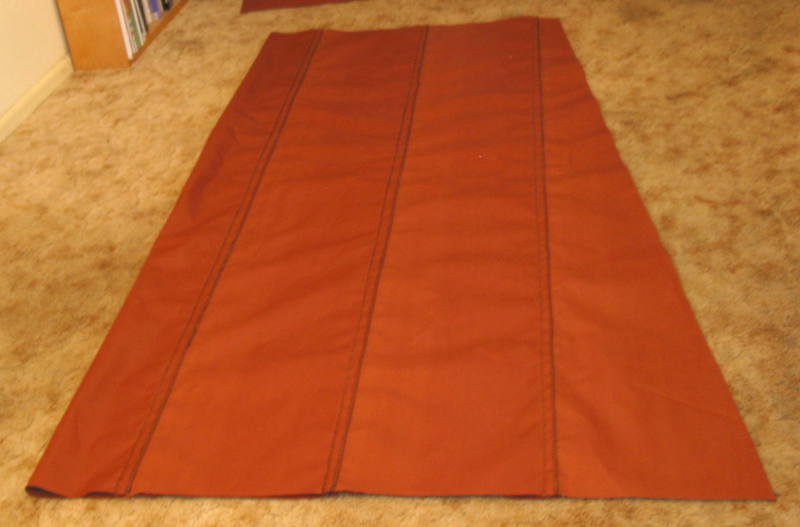
| Uncut sail, folded in half | Sail after initial cutting, folded in half | Sail after initial cutting | ||
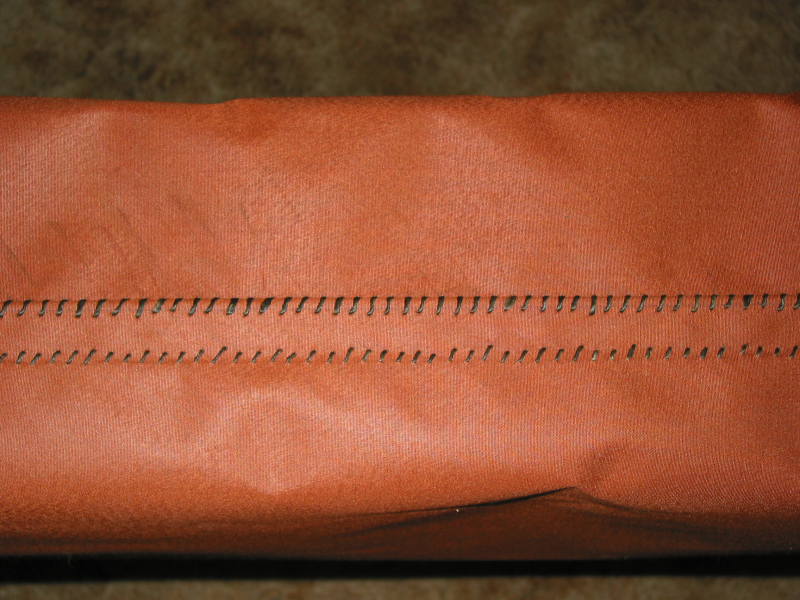
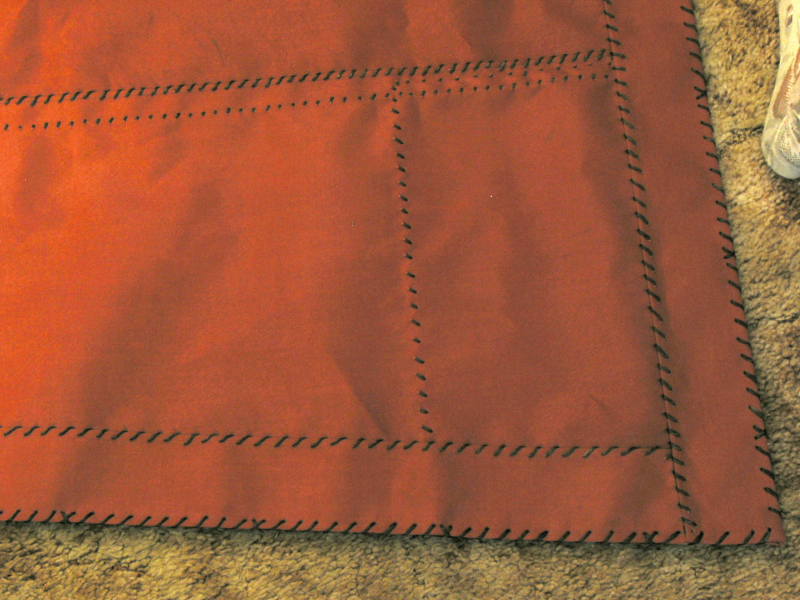
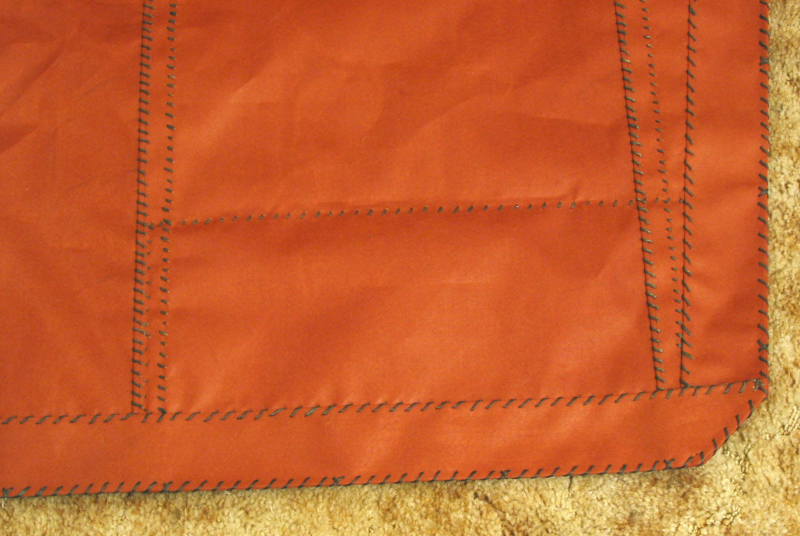
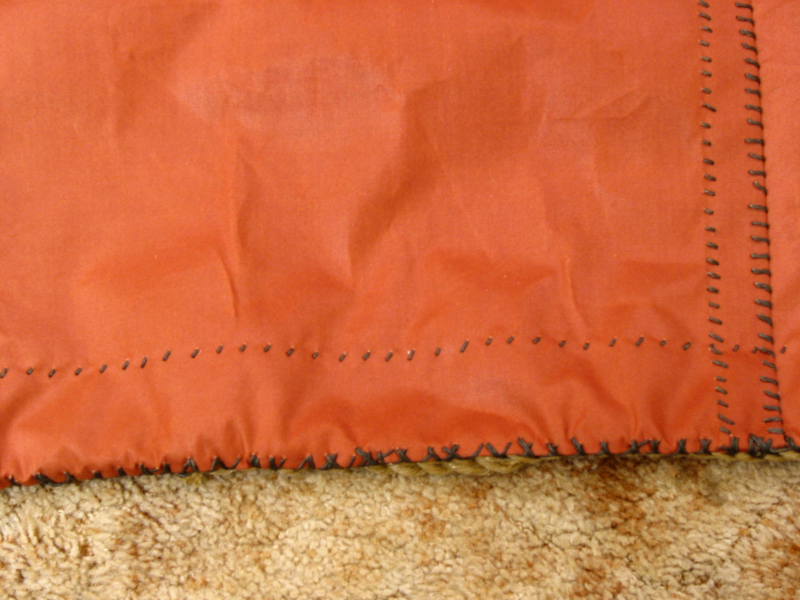
The next step was to sew the corner linings on the four corners. These were sewn on the front of the sail. The tablings were then sewn along the entire length of each edge of the sail. These were sewn on the back of the sail. Steel specifies around 2 stitches per inch for the linings and tablings (again specifying a range for the number of stitches per yard). My stitching is actually a bit tighter than that. The linings are sewn with the standard flat seam, while the tablings have a flat seam on one size and a round seam on the edge of the sail. I sewed a cross stitch every 10 stitches on the round seams.
The tablings have a half inch seam allowance on both sides. The linings have a half inch seam allowance on the interior two sides, and a one inch seam allowance along the edge of the sail. All of the seam allowances were folded in as the sewing commenced. In no cases was any material trimmed out, as I might do if I was sewing a garment.
 |
 |
 |
 |
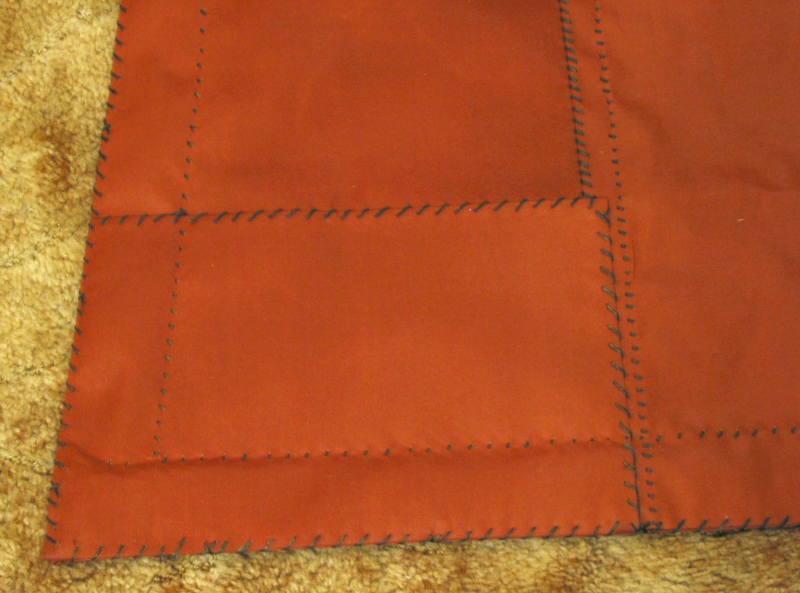 |
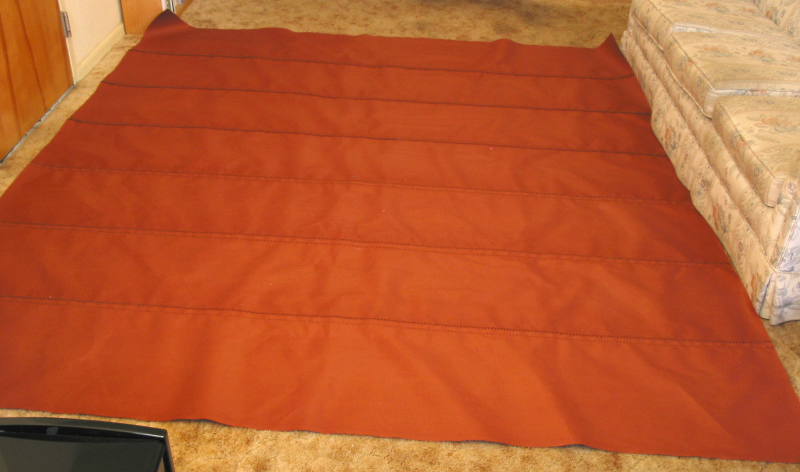
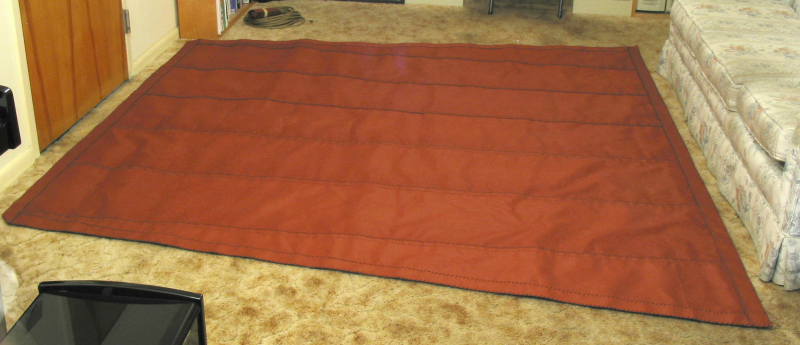
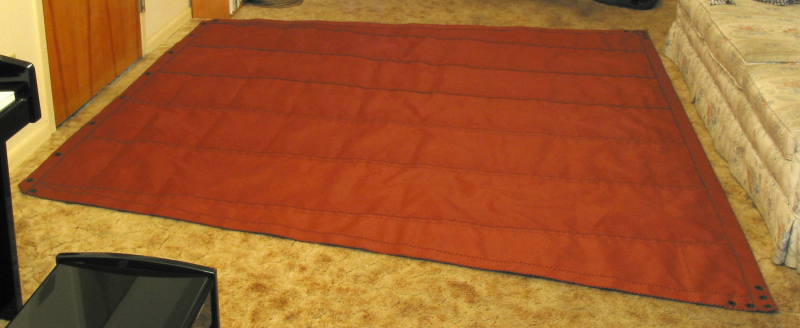
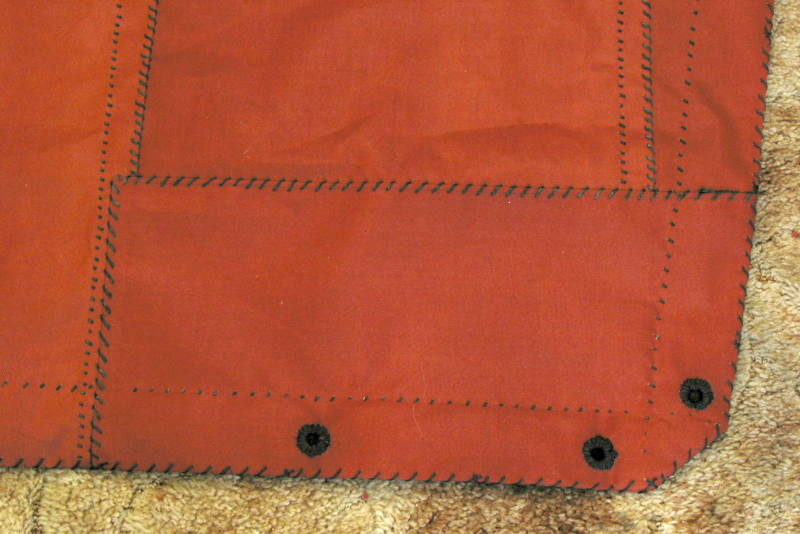
| Sewn sail, missing only grommets and boltrope | Back of a bottom corner of the sail | Back of a top corner of sail | Front of a top corner of sail | Front of a bottom corner of the sail |
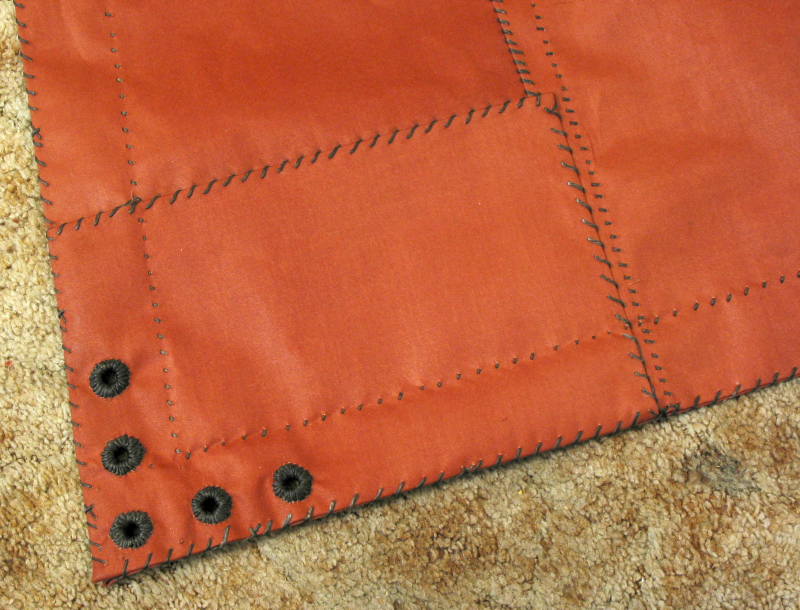
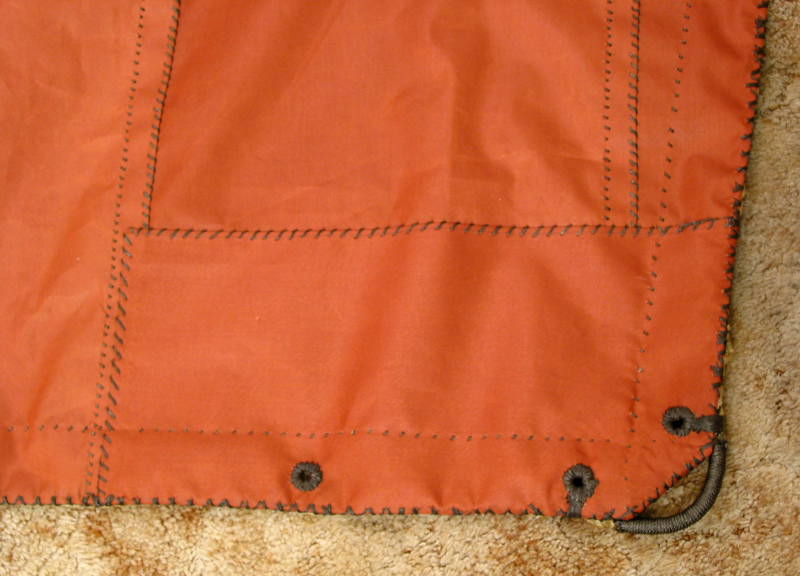
Next, 20 grommets were added. The grommets are each made from tarred marline, then sewn in with doubled thread. Six grommets are along the top of the sail to secure it to the yard. There are two grommets at each of the head cringles to reinforce the sail at that point. There are five grommets at each clew, also for reinforcement. Steel suggests that this is the bare minimum for grommets near the clew; he actually recommends having them go one quarter of the way up the leech of the sail.
I punched a small (3/8 inch) hole at the center of each grommet. This turned out to be a royal pain, as the canvas is very tough stuff. Also, I marked a 1 inch diameter circle to aid in sewing the grommets.
 |
 |
 |
 |
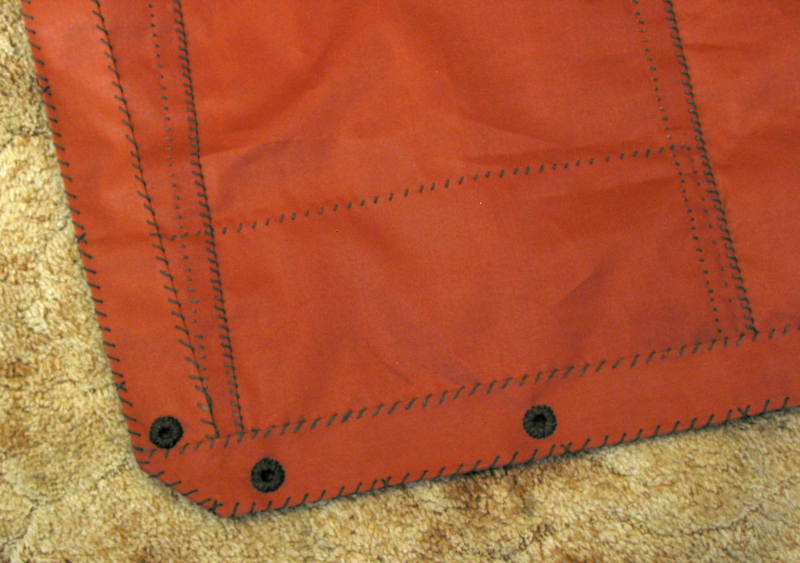 |
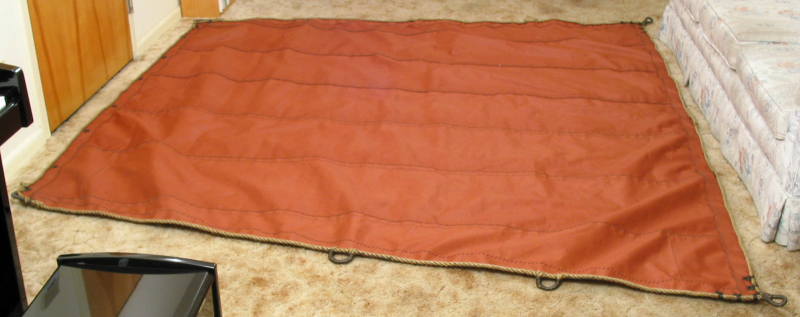
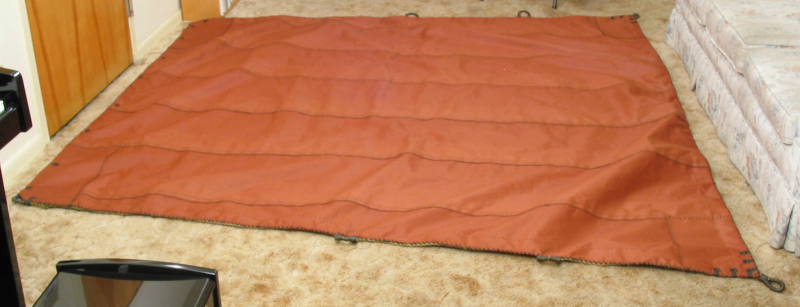
| Back of the entire sail, with grommets but no boltrope | Front of a bottom corner of the sail | Back of a bottom corner of the sail | Front of a top corner of sail | Back of a top corner of sail |
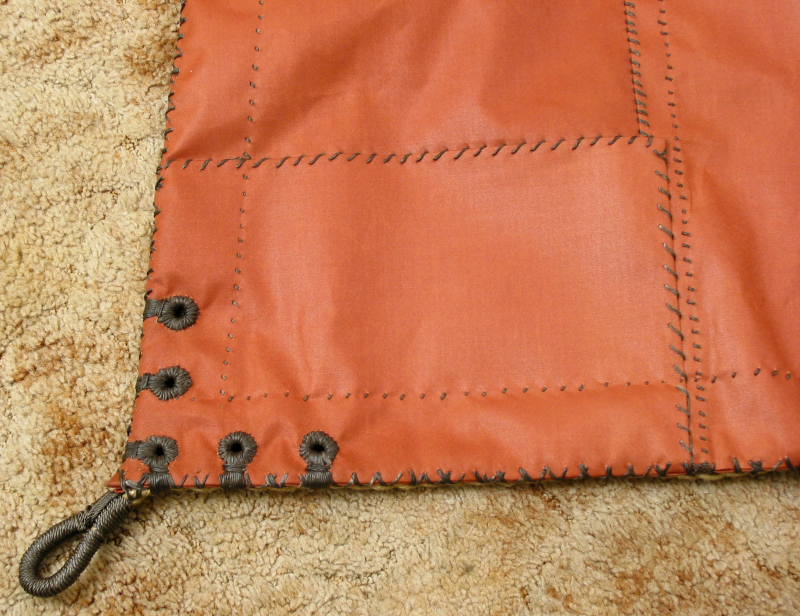
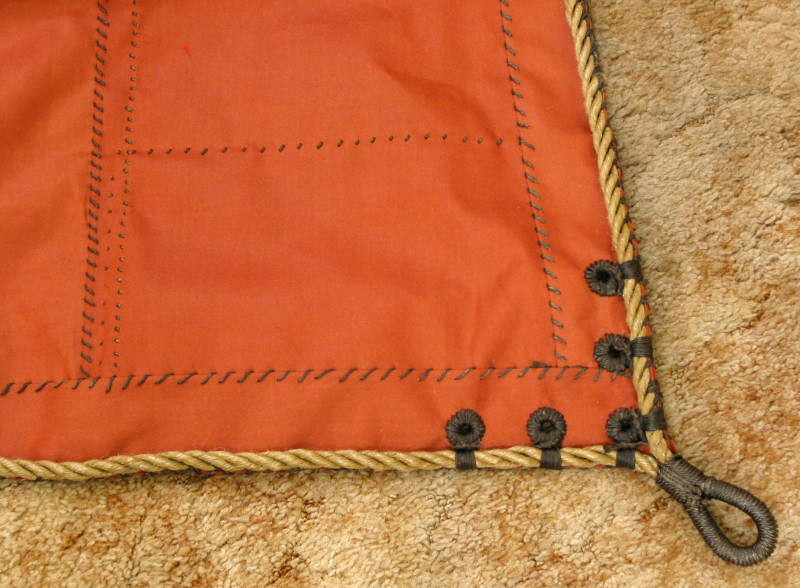
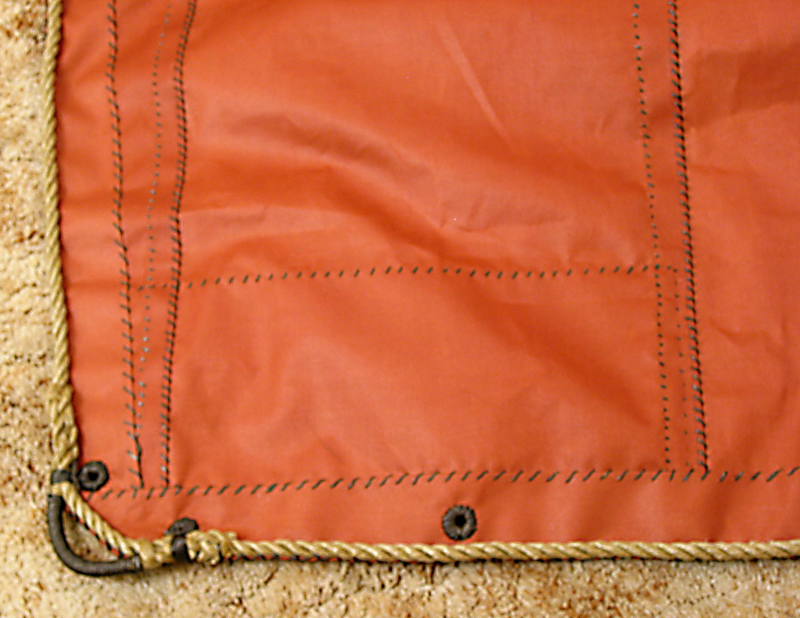
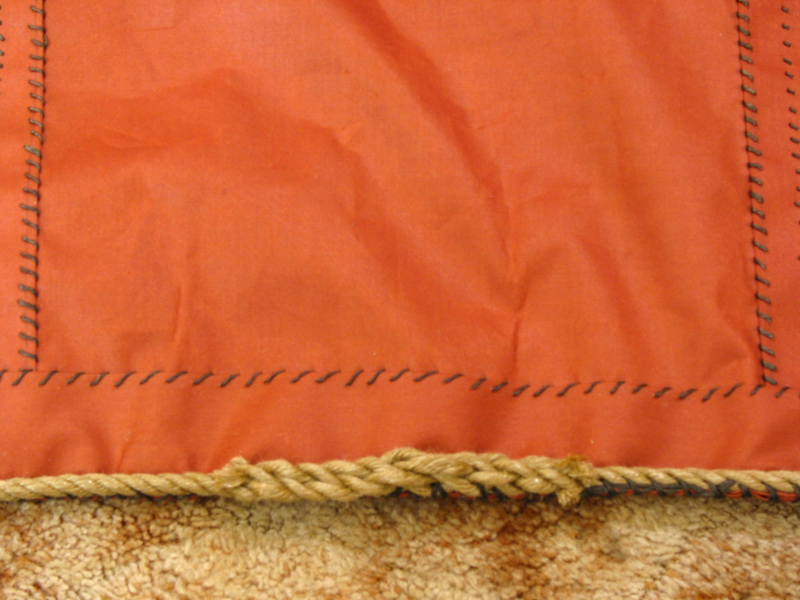
The bolt rope was added starting at the center bottom of the sail. The rope is stitched through every twist between two of the strands. Every twelve stitches, plus at some additional points, I added one or more cross stitches. This isn't quite the cross stitching specified in Steel.
The various clews and cringles were added as I came to them. I served all of the clews and cringles with the tarred marline, both to reduce chafe and to make them more secure. The clews and head cringles were wormed with single threads of tarred marline before serving. I really could have used a serving board -- the fid and a marlinespike hitch just don't work especially well or efficiently.
I felt that the clews came out quite well. The head cringles were of two different qualities, mainly because I was still learning how to splice the Spunflex (the strands want to unlay once the strands are separated). The bowline cringles are somewhat lumpy, which I will again blame on my ability with Spunflex -- I can make perfectly decent cringles in manila.
A note about the head cringles: I could have made these in any of three styles. First, they could have been folded double and seized like the clews. Second, I could have made loops 'external' to the basic trapezoid of the sail. Third, I could (and did) make loops 'internal' to the trapezoid of the sail. This third option allows a slightly wider sail on the same yard as either of the other two options. I was afraid that the sail would stretch and be too wide for the yard if I made the head cringles in either of the first two fashions. Also, the spliced in piece of line is against the sail, leaving the continuous boltrope as the part that bears the strain of holding the sail (rather than putting the strain on the splice).
The boltrope is spliced to itself at the center bottom of the sail. I should have given the rope another full turn to untwist it further before splicing it, but I didn't know that at the time. As such, the rope is in slightly greater tension along the bottom than elsewhere. It doesn't appear to be a problem, but it was somewhat dissatisfying.
After sewing in the boltrope, I seized the various grommets to the boltrope. There are a total of 16 seizings: two on each head cringle, and 6 on each clew. The corner-most grommet at the clew is seized in two directions. Marino recommends seizing the grommets amongst themselves, but Steel doesn't seem to recommend this. I chose not to.
 |
 |
 |
 |
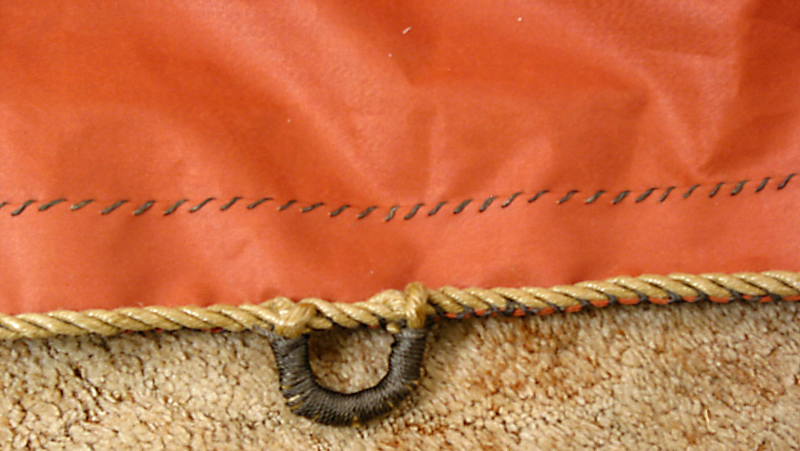 |
| Back of completed sail | Front of completed sail | Front of clew | Back of clew | Back of cringle |
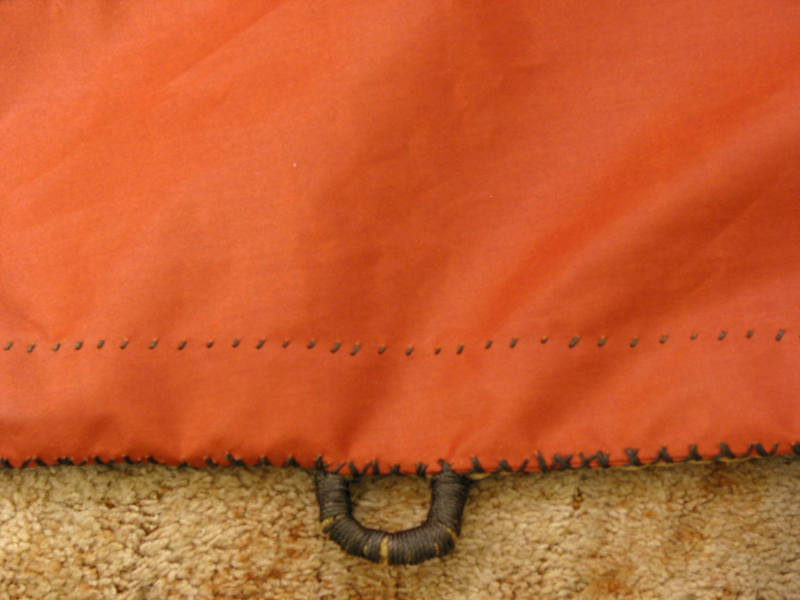 |
 |
 |
 |
 |
| Front of cringle | Front of head cringle (earring) | Back of head cringle | Back of boltrope splice | Front of boltrope splice |
 |
||||
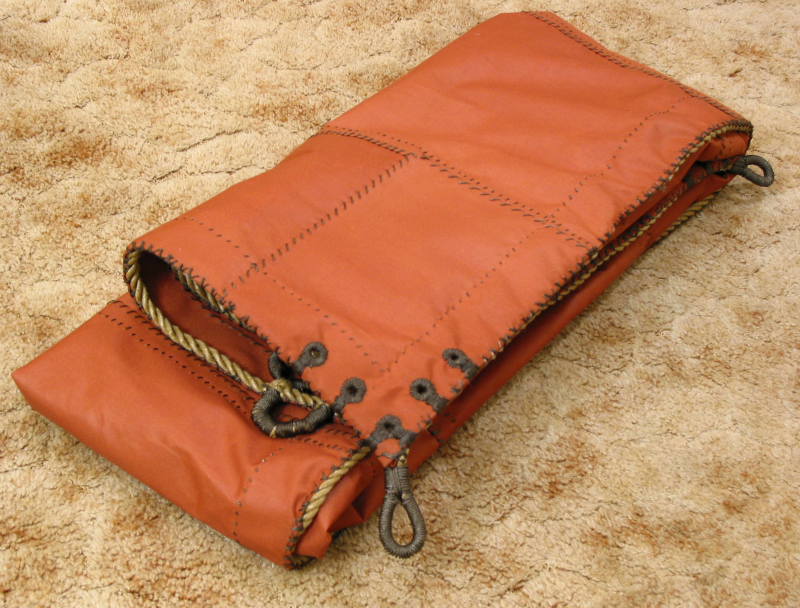
| Folded completed sail |
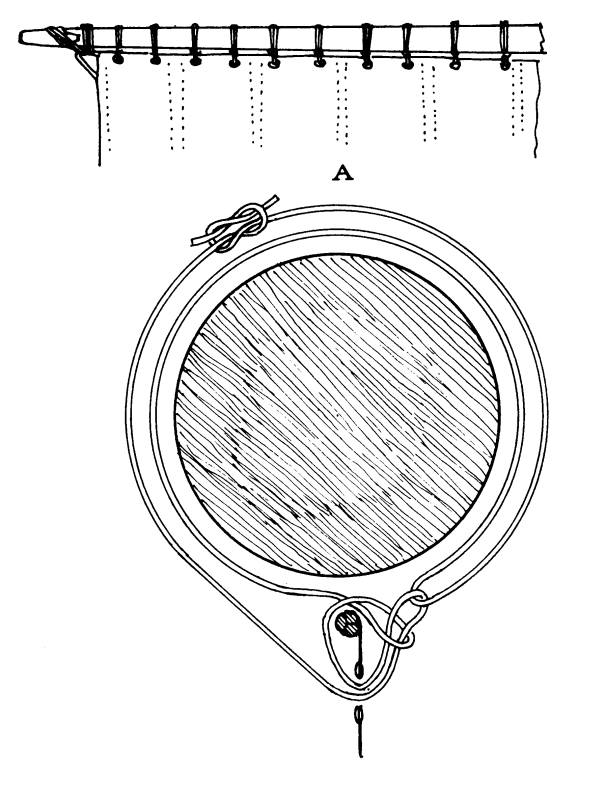
I made up a new halyard, a new parrel, new brace lines, and new sheets to go on the new yard and sail. The sail is bent to the yard using instructions found in John Harland's Seamanship in the Age of Sail, a thoroughly delightful book on the mechanics of operating a square-rigger. I also made up braided furling lines, which were then made to the yard. Naturally, all ends of ropes were whipped and shellacked.
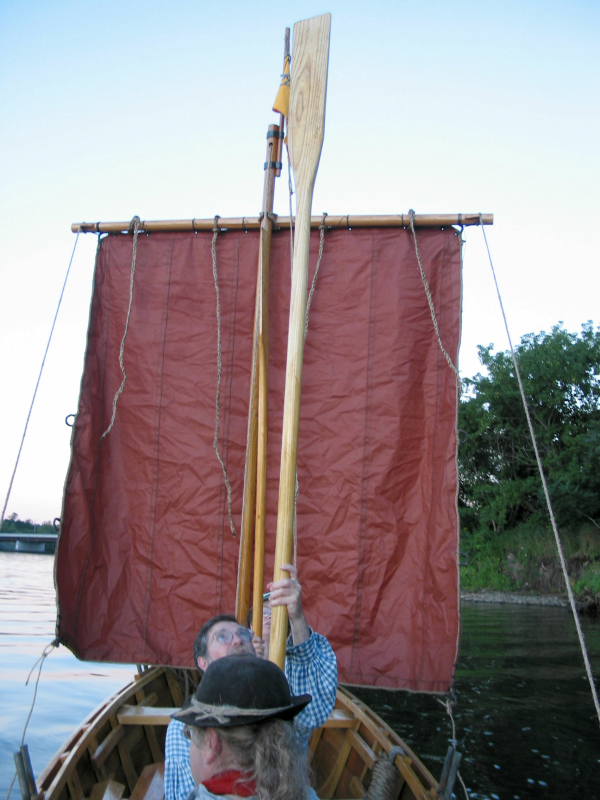
The sail and yard fit handsomely on the existing mast. Unfortunately, there was no wind on the day it was first raised, and the sun was setting, so the pictures aren't as good as they might be.
 |
 |
 |
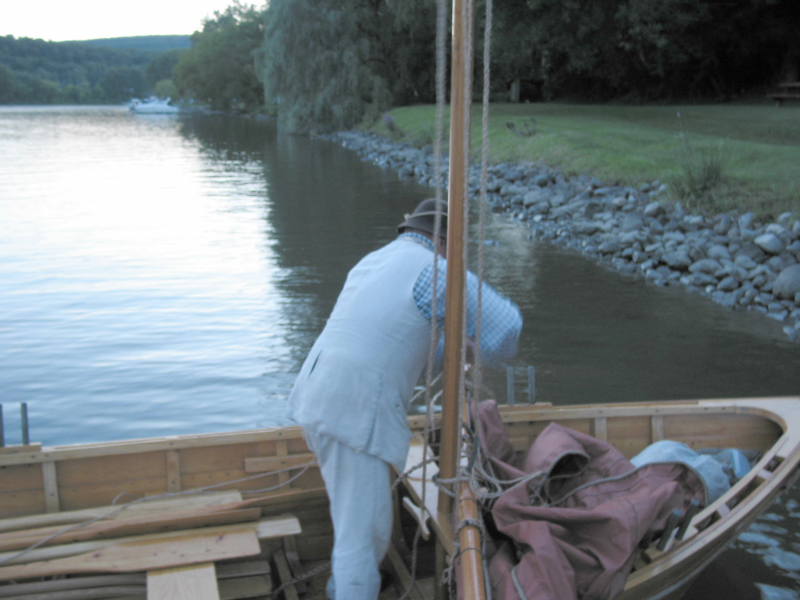 |
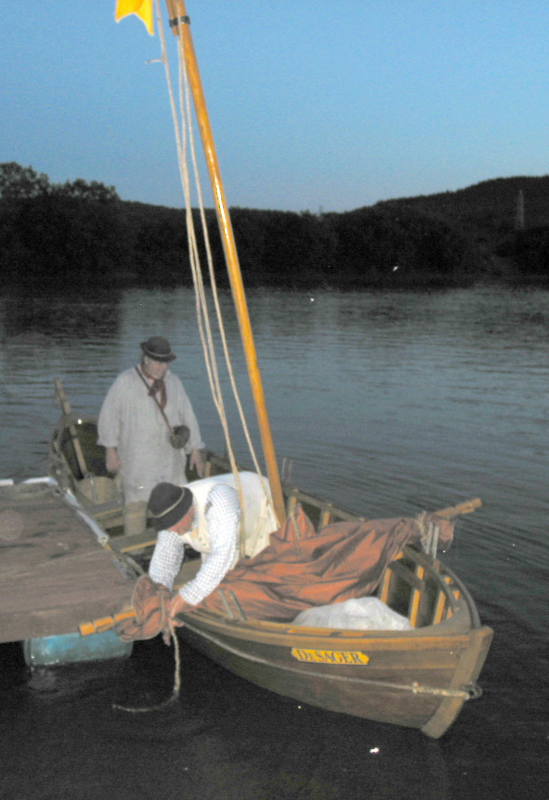 |
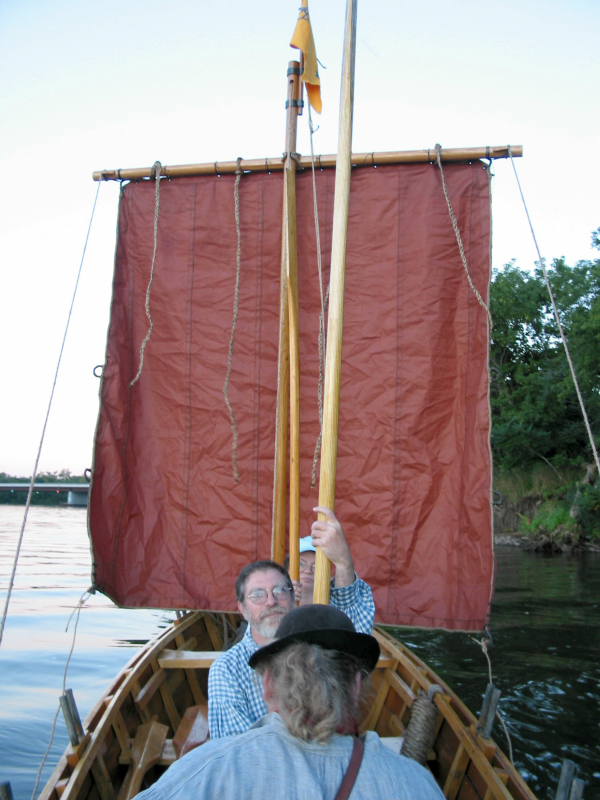
| The method of bending the sail to the yard. Copied from Harland. | The new sail and the new yard, set the first time. Crew at toss oars. The furling lines can be seen dangling behind the sail. | A blurry image of me beginning to furl sail | Me furling the sail | |
We took a four-day-long, 92 mile trip from Schenectady to Kingston in October 2004. This was the first serious use of the sail. We sailed a total of around 22 miles, including some upwind sailing. A few pictures from the trip are here.