Copyright 2002 by David Manthey. Click on images for a larger version.
|
Introduction |
|---|

 |
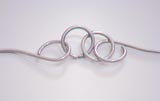
This is how I made a Gunter's chain (also known as a
survey chain). The total length of a Gunter's chain is 4 poles (66 feet),
and the chain is composed of 100 links. Each link is joined to the next by
one or two round rings; I chose to use two rings. The link plus associated
rings are exactly 7.92 inches in length. The first and last links are
handles.
Every ten links there is a brass tag that identifies the number of links.
At link 10 and link 90, the tag has one point. At link 20 and link 80, the
tag has two points. At 30 and 70, three points, and at 40 and 60, four
points. At link 50, the halfway point, a round tag is used.
I chose to use rings with an inner diameter of 1/2 inch. I also used
this as the nominal inside diameter of the eyes of each link. This is a
typical value for historic chains.
|
|
Materials |
|---|
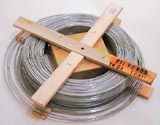 |
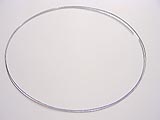
Wire - 14-gauge galvanized steel wire. I purchased a 1/4 mile
spool of this from Agway (the local farm supply store) for $20. It was
intended for use with electric fences. This is probably enough to make 8
chains. Historically, chain wire ranged in size from 14 gauge to 8
gauge. |
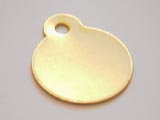 |
Brass Tags - Used for the ten-link markers. I ordered a bag of
25 from McMaster-Carr, part 1540T22, 1 1/4" diameter, with ear. This cost
around $8 plus shipping. Nine are needed (plus any that get fouled
up). |
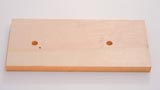 |
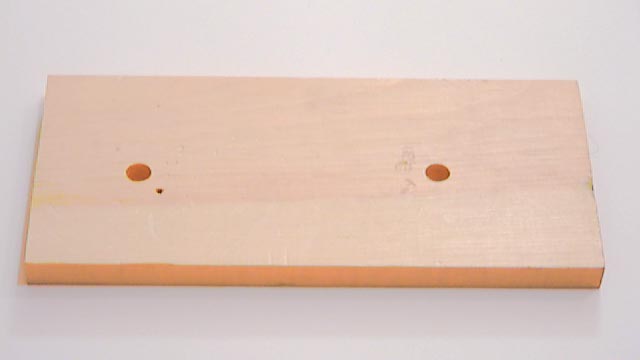
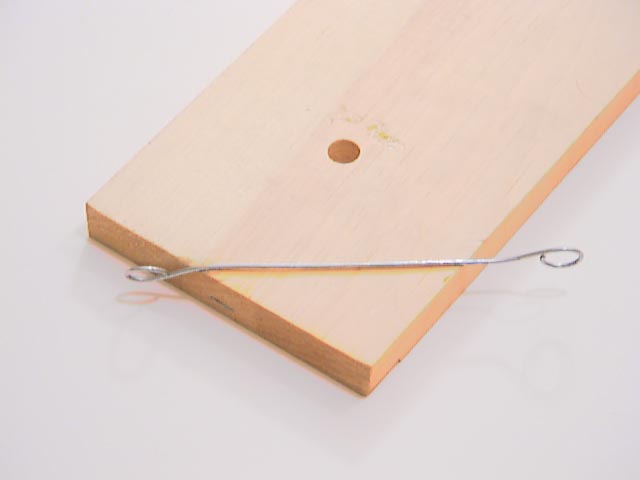
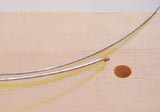
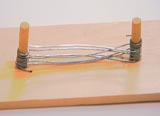
Link Jig - This is a wooden board with three holes drilled in it.
There are two 1/2 inch diameter holes (the inner diameter of the eyes of the
links), at a center-to-center distance of 6.42 inches (7.92 minus the inner
diameter of the rings multiplied by the number of rings and minus the inner
diameter of the link eye). There is a small hole near one of the 1/2 inch
holes that is a little larger than the diameter of the wire. The placement
and size of this hole need not be exact. |
 |
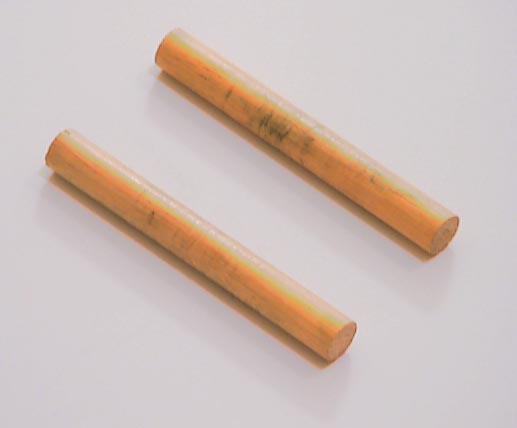
Dowels for Link Jig - These are two dowels of equal length and the
same size as the inner diameter of the eye of the link. In this case, I made
them 4 inches long and 1/2 inch in diameter. |
 |
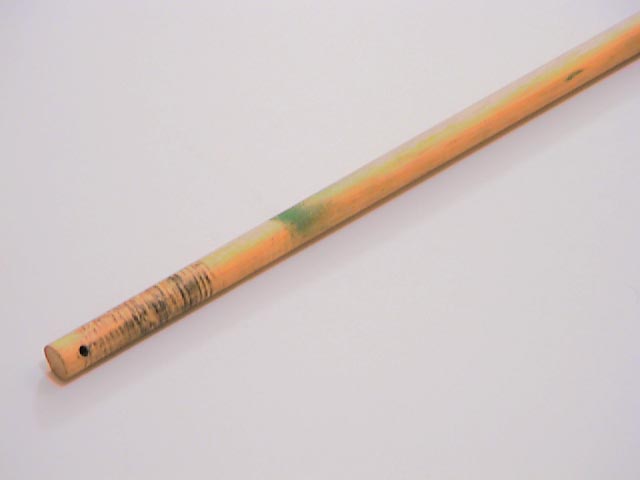
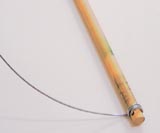
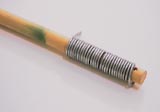
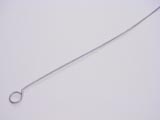
Ring Winder - This is a dowel the same diameter as the inner
diameter of the rings with a hole drilled through near one end. The hole
needs to be slightly larger than the diameter of the wire. |
|
Tools |
|---|
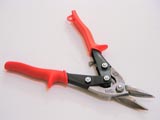 |
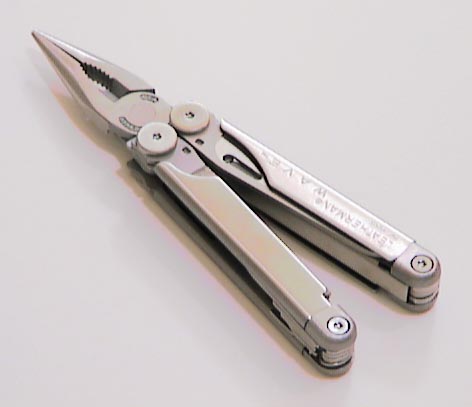
Wire Snips - These are the most frequently used tool. They need
to be able to cut the wire easily, not be too tiring, and have small enough
jaws to fit inside a coil of wire with the chosen ring diameter. |
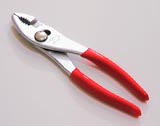 |
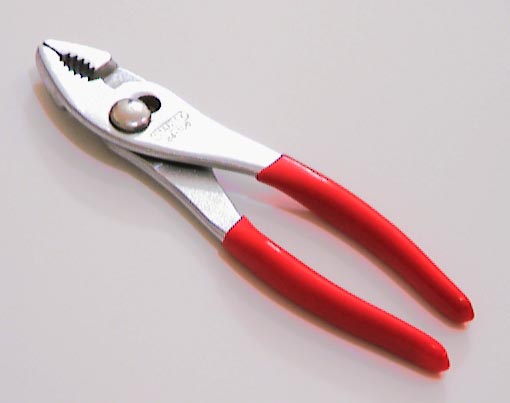
Pliers - These are used to help shape the links, close rings and
link eyes that have gaps, and to generally manipulate the rings. The round
section designed for gripping nuts is useful to grab rings and eyes. |
 |
Needlenose Pliers - These are used to help form the neck on the
links immediately adjacent to the eye. They are also useful for flattening
the brass tags after they have been cut. |
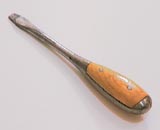 |
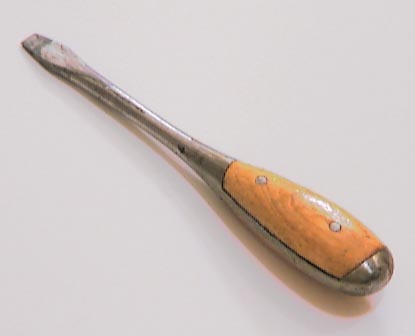
Screwdriver - A flathead screwdriver is useful for prying apart
link eyes and rings. |
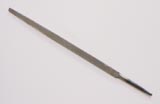 |
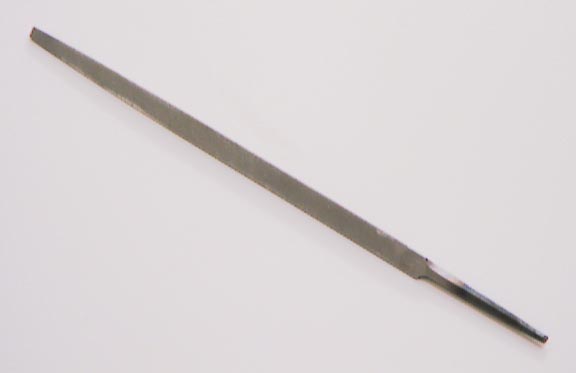
Metal File - This is used to deburr the edges of the brass tags.
A triangular file is useful because it can reach into the 'V' on the
tags. |
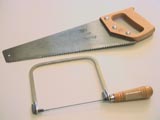 |
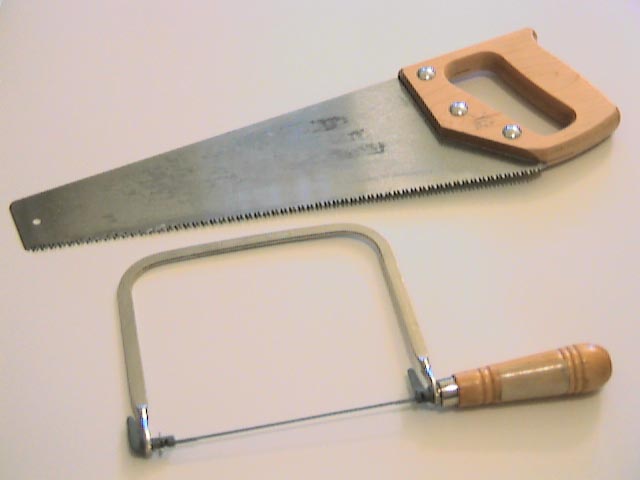
Wood Saws - Used for making the jig and cutting the dowels to
length. |
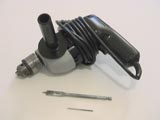 |
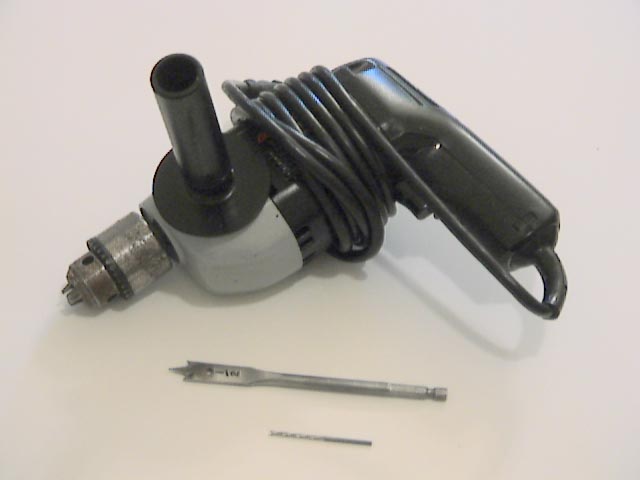
Drill and Bits - Used for making the jig and boring a hole in the
ring-winder. A bit the size of the inner diameter of the link eyes is
needed, plus a bit slightly larger than the diameter of the wire. I used 1/2
inch and 3/32 inch bits. |
Tape Measure - (not shown) - One needs to verify the
chain somehow. Although the average carpenter's tape measure isn't as
reliable as actual survey equipment, it is adequate for a rough chain such as
this. |
| Pencil - (not shown) - For marking the jig, the tags,
and other items. |
Safety Equipment - (not shown) - Eye protection is a
must. Gloves are a good idea. |
|
Making Rings |
|---|
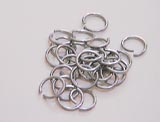
| For a chain with two rings per link, 198 rings are needed.
Additionally, each of the nine tally tags is held on by another ring,
bringing the total to 207 rings. It is convenient to make a few rings as one
is making the links (see the section on making links below). However, some
rings will need to be made by themselves. |
 |
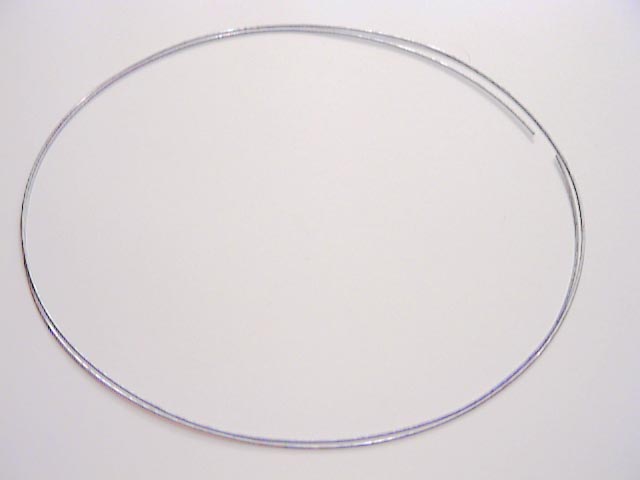
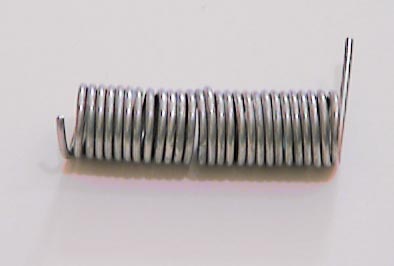
Step 1 - Cut some wire - Cut off a comfortable working
length of wire. I found that less than four feet was too little to bother
with, while more than eight feet was too much of a pain to work with. If you
use an automated winder (see comments on later steps), you will want to work
with more wire at a time. I found that the appropriate length was roughly
1 1/2 loose coils off of the spool of wire. |
 |
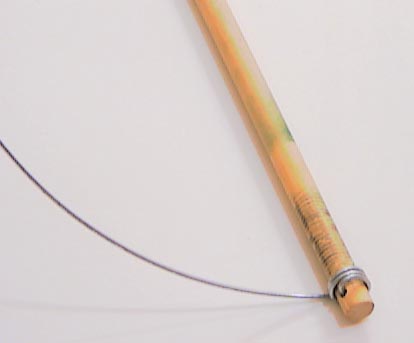
Step 2 - Put the wire on the winder - Insert one end of
the wire into the hole near the end of the winding stick. The wire should go
most of the way through the hole but not emerge from the other side
(otherwise, there will be a sharp point of wire waiting to scratch you).
Bend the wire over and begin to wrap it around the winder. At first it is
easy to turn the winding stick, but after a while it becomes easier to
grip the winding stick firmly and spin the wire about it. |
 |
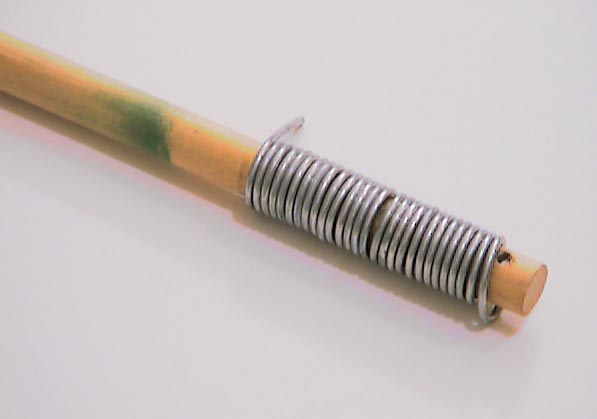
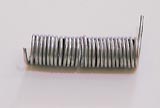
Step 3 - Wind all of the wire - Continue winding until
all of the wire is on the winding stick. Be sure to lay the wire on evenly
with no overlap. Also be sure that the wire is snugly against the stick.
An automated winder can be made by mounting the winding stick between two
upright boards (though a hole drilled in each) and spinning the winding stick
with a drill. Wear gloves. Websites that detail how to make chainmail have
drawings for such a device. |
 |
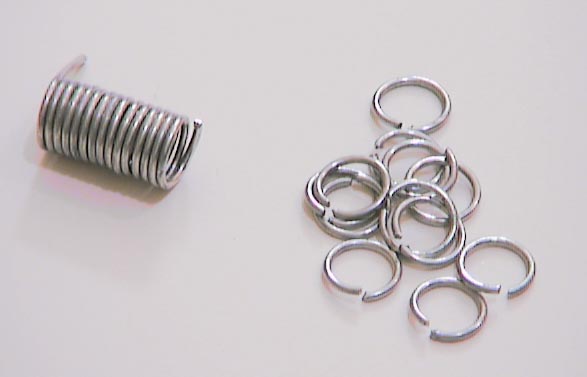
Step 4 - Remove the wire from the winder - Use the wire
snips to cut the wire just where it comes out of the starting hole. The
wire in the starting hole can now be removed and discarded. The coil of wire
will slide off the of the winding stick. |
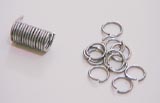 |
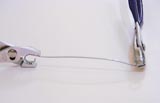
Step 5 - Cut the rings - Use the wire snips to cut the
rings apart. Cut along the length of the coil. There will be a small
amount of waste at each end of the coil. Cut straight through. Often I can
cut several rings at once; it is limited by how far the wire snips will fit
into the coil. Go slowly on the last few rings to avoid shooting bits of
wire across the room. |
 |
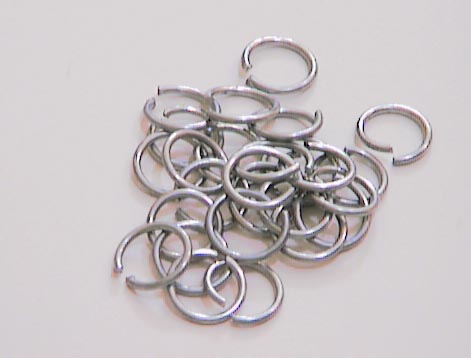
Done - Set the rings aside for use in assembling the
links and attaching the tags. |
|
Making Links |
|---|
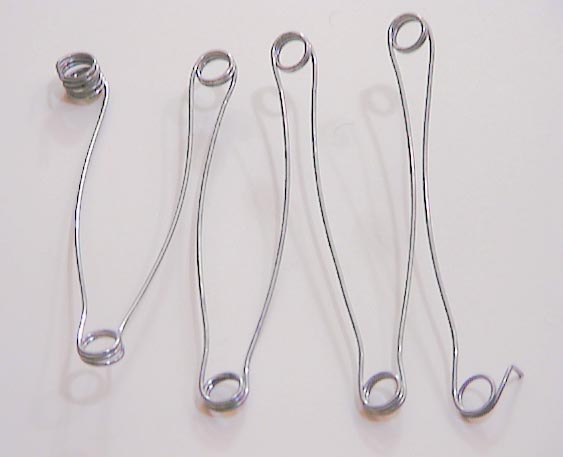
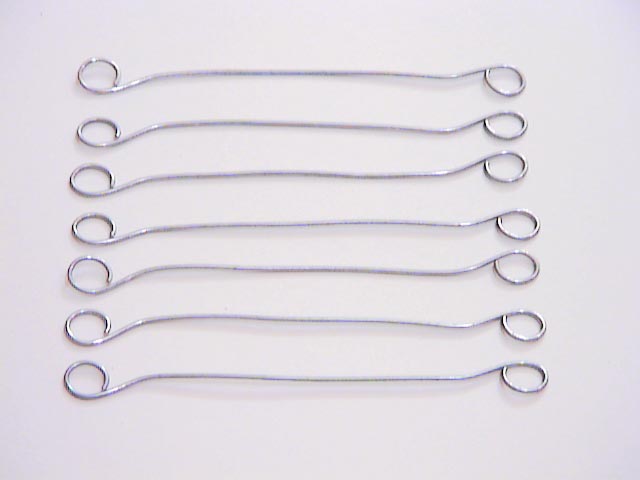
| A chain needs 98 regular links and two handle links. The
length of the link plus the inbetween ring(s) must be 7.92 inches. When
winding the links, one need not be perfect; the length of the links can be
adjusted as the chain is assembled.
A winding jig is needed to make links. See the materials list for
details. |
|
Step 1 - Cut some wire - Cut off enough wire to make a
sensible number of links. I found that I could make seven links at a time.
If I attempted to make more, my needlenose pliers didn't have enough jaw
depth, and the additional links tended to be short. Around 12 inches of wire
is needed per link. I found that the appropriate length was roughly 2 loose
coils off of the spool of wire. |
 |
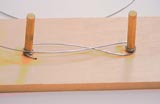
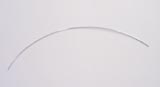
Step 2 - Start the wire - Put one end of the wire in
the small hole in the jig. Bend the wire over 90 degrees so that the coil is
flat with respect to the jig board. |
 |
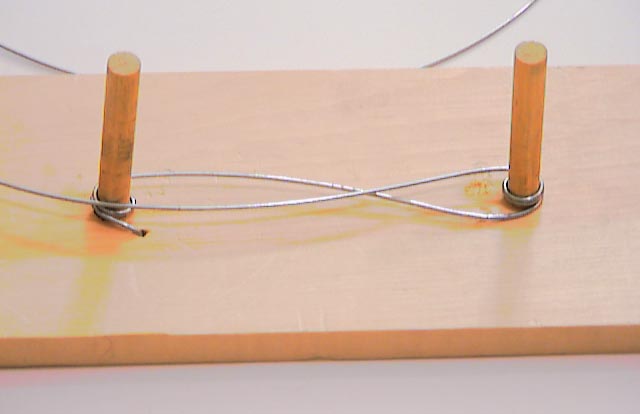
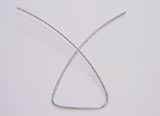
Step 3 - Wind around the first dowel - Insert the jig
dowels into the holes. Bend the wire around the dowel nearest to the starter
hole, keeping it tight to the dowel. Start winding on the side furthest
from the second dowel (henceforth referred to as the outside of the dowel),
and go around 1 1/2 times. Do not overlap the wire; rather, put the second
coil above the first. There will be one level of wire at the inside of the
dowel and two on the outside. |
 |
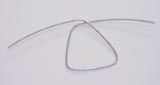
Step 4 - Wind around the second dowel - Switching to the
opposite side of the second dowel, wind the wire 2 1/2 times around the
second post. The wire will form either an 'S' or backwards 'S' shape between
the dowels. There will be two levels of wire at the inside of the second
dowel, and three levels on the outside. Again, make sure the winding is
tight to the dowel and that the wire does not overlap. |
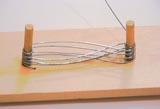 |
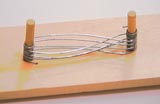
Step 5 - Wind the rest of the links - Continue in the
same manner, switching sides when switching dowels. Wind 2 1/2 turns around
each dowel. Proceed until the desired number of links are wound. Unless the
dowel holes are drilled very precisely in the jig, the dowels will have a
tendency to tilt in toward the center, making the later links slightly
shorter than the first few links. Although it would be best to prevent this
tilting in, winding the later links slightly looser seem to work well
enough. Note that the crossing point of the links will not be centered
between the two dowels due to the residual curvature of the original wire;
this will be corrected for later. |
 |
Step 6 - Wind any remaining wire into rings - If there
is any significant amount of wire left, wind it around the dowel it is
closest to. This can be turned into additional rings to put between the
links.
Note that two short links will be needed as part of the handles. For
these, leave the excess wire (at least a links worth) straight so that it
will have only one eye. See the section on handles for details. |
 |
Step 7 - Form the neck of the links - Use the needlenose
pliers to squeeze all of the links a short distance from each of the two
dowels. This puts an angled neck into the link, straightens the wire
somewhat, and reduces the residual curl from the wire coil. This step is
not strictly necessary, but it does make forming the links easier. |
 |
Step 8 - Remove from the jig - Take the links off of the
jig. This is where having removable dowels comes in handy. After removing
the links from the jig, use a flat bladed screwdriver to slightly pry apart
the inside end of each link junction (the part of the eye where there are two
thicknesses of wire). This will make cutting the links easier. |
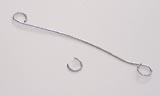 |
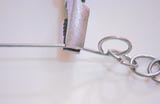
Step 9 - Cut off a link - Use the wire snips to cut off
a link. Cut as close to the shaft of the link as is convenient so that the
eye is nearly a complete loop. There will be a slight gap. Between each
link there is around 3/4 of a ring of scrap. |
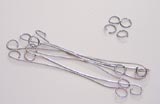 |
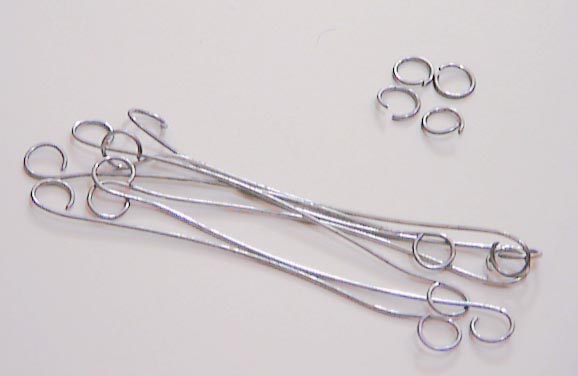
Step 10 - Cut the rest of the links and rings - Use the
wire snips to cut off the rest of the links. Also cut any spare rings that
were wound. |
 |
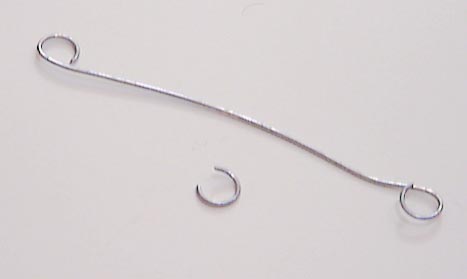
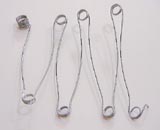
Step 11 - Straighten the links and close the eyes - Lay
a link on a flat surface (such as the jig). Flatten any bend in the link.
Next take the regular pliers and close each eye. The eye can be closed in
two manners: (a) by squeezing it with the jaws of the pliers, and (b) by
grabbing the back of the eye (away from the opening) and rolling the eye
closed. Method (a) lengthens the link somewhat, method (b) shortens it.
Ideally, the final link needs to be 6.92 inches (7.92 less the inside
diameter of the rings). Make the gap at the eye as small as possible.
|
 |
Step 12 - Form the neck near each eye - Form the neck of
the link by placing the link on a flat surface, and pushing down on the eyes,
keeping the eye opening upwards. The shaft of the link should be fairly
straight. |
 |
Done - The links are ready to be added to the chain.
They will most likely need some slight length adjustment at that
time. |
|
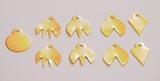
Making Tags |
|---|
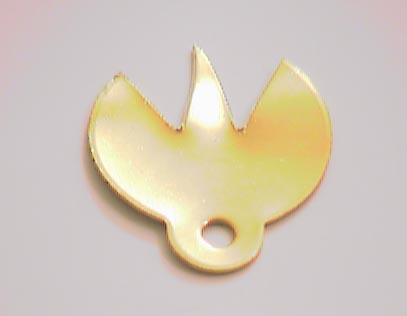
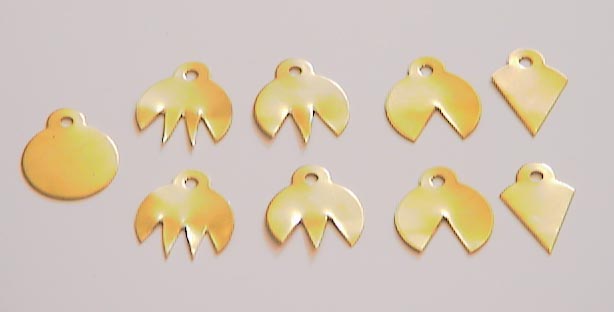
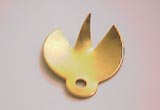
| A chain needs a tag to mark every ten links, using a total
of 9 tags (the ends are not marked by tags). Two tags of each of four shapes
are needed, plus one round tag for the center. Historically, the tags varied
quite a bit. |
 |
Step 1 - Mark the tags - Mark the tags for cutting.
Many different shapes can be used. I chose to make simple tags based on the
premade round ones that I had purchased. Transfer the design to the tags
using a pencil. |
 |
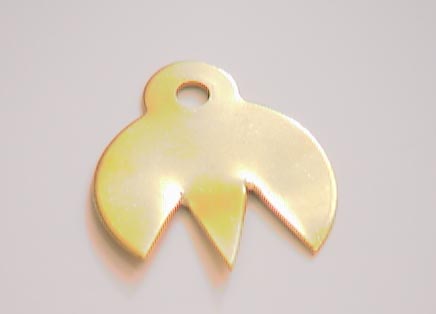
Step 2 - Cut the tags - I used the wire snips to cut the
tags. This had the disadvantage that it bent the tags as it cut them. I
think a metal bandsaw would be a preferred method. |
 |
Step 3 - Flatten the tags - Use the needlenose pliers to
flatten out the tags. They won't be perfect. |
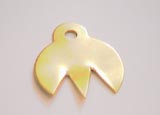 |
Step 4 - File the edges - Use the triangular metal file
to smooth the cut edges and the points on the tags. By angling the file, a
very tight corner can be reached. |
 |
Done - The tags are ready to be added to the
chain. |
|
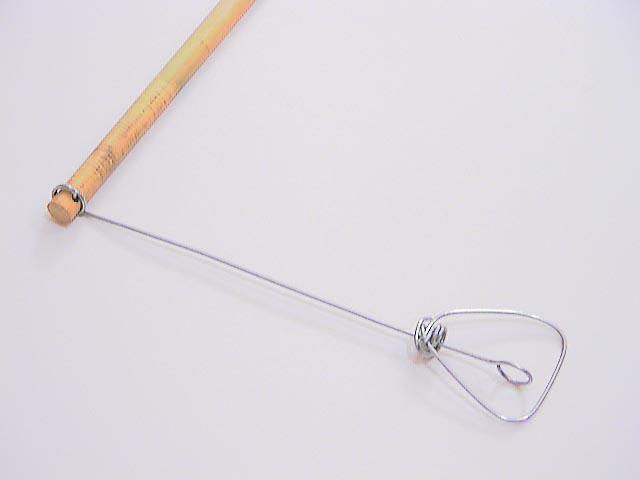
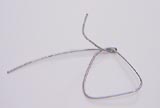
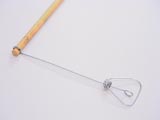
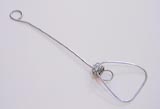
Making Handles |
|---|
| The handles on the chain form the end links. Specifically,
the outside edge of the chain is the point from which things are measured.
Historically, chains either had wire handles or cast brass handles. Often,
but not always, the handles act as swivels to aid in untwisting the chain.
Some chains, but by no means the majority, also had a swivel link somewhere
near the center in place of one of the regular links. |
 |
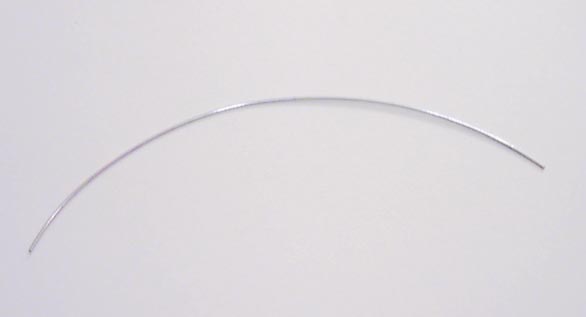
Step 1 - Cut some wire - Cut off around 14 inches of
wire. This will be slightly more than is necessary for a handle. |
 |
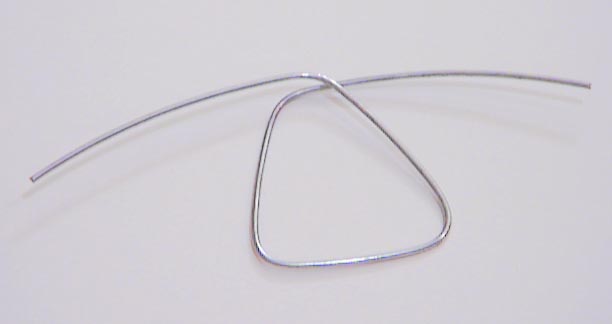
Step 2 - Form the gripping surface - Put three fingers
at the center of the wire and bend the wire around the fingers to form an
isosceles triangle. |
 |
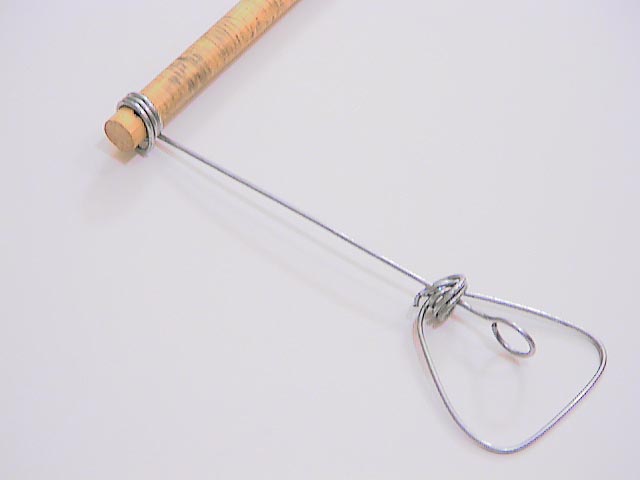
Step 3 - Start the neck - At a slight distance more than
the width of the grip, bend both sides of the handle inward, leaving an
overlap of around 1/2 inch. |
 |
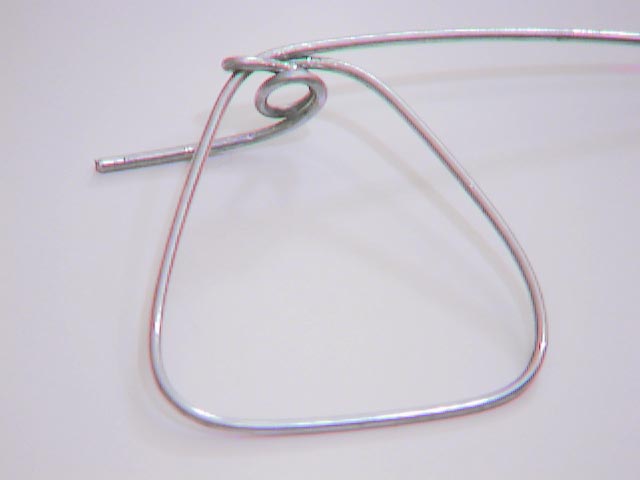
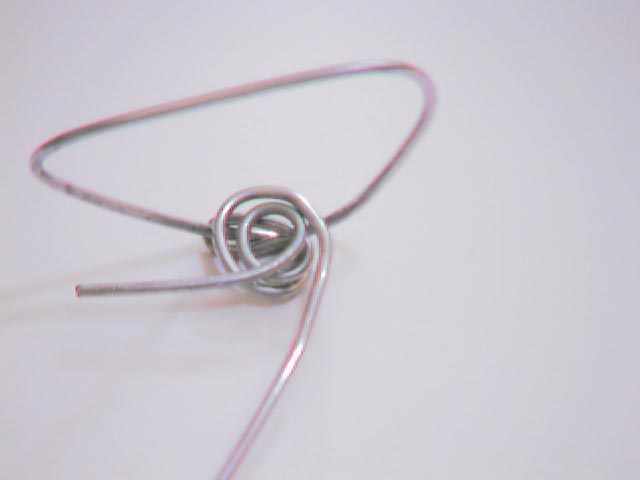
Step 4 - Begin wrapping the wire - Starting with
whichever side of the neck is further from the grip, fold the wire around the
opposite side, pinching it tightly. The wire must be put through the
handle. The needlenose pliers work best here. |
 |
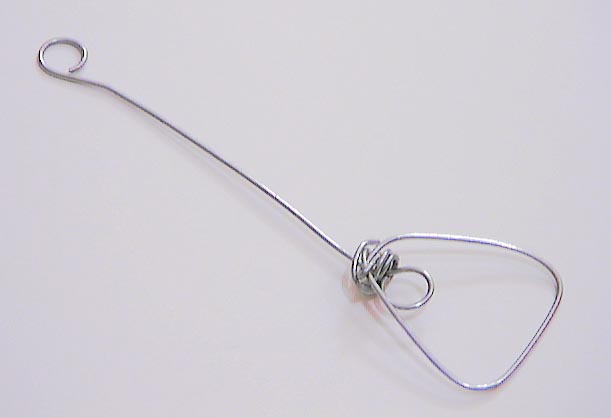
Step 5 - Form the eye - Using the needlenose pliers,
form a loop of wire. The loop must be at least as large as the diameter of
the wire and no larger than 1/4 inch in diameter. I found it useful to use
the regular pliers to grip the wire. Make sure the loop is on the same side
of the neck as the grip. |
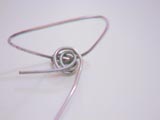 |
Step 6 - Reinforce the eye - Wrap the second side around
the first loop. This should either be immediately outside of the first loop
or between the first loop and the neck (and always inside of the sides of the
handle). |
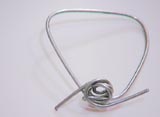 |
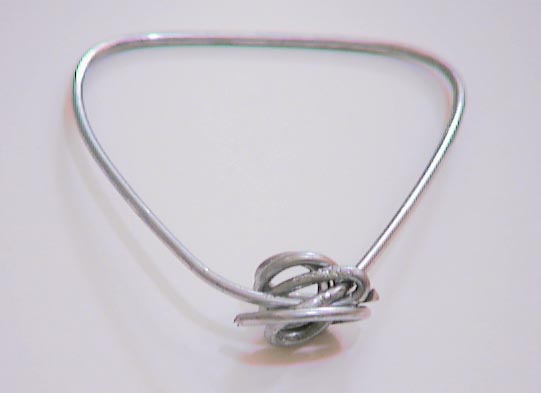
Step 7 - Reinforce the base - Continue wrapping the same
wire, this time forming another loop on the other side of the neck (away from
the grip). |
 |
Step 8 - Fold in and clip the ends - Fold in the ends of
the wires. Use the wire snips to cut them as close as possible to the bulk
of the handle. Fold in any protruding wire. |
 |
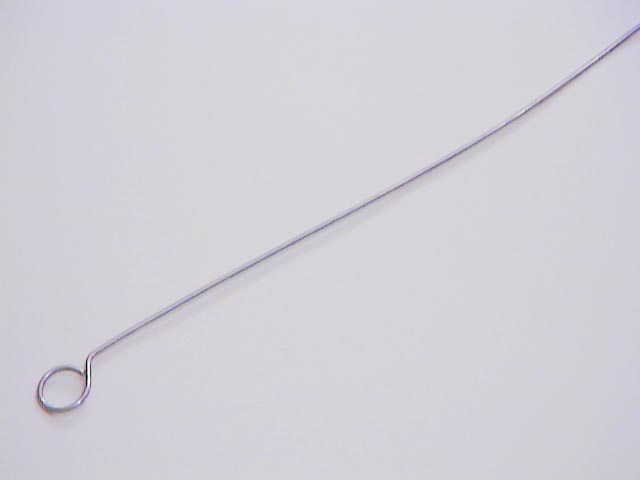
Step 9 - Form one end of a link - Form one end of a link
on the link jig. Close the eye and form the neck. The free end should be
long enough to form a regular link, plus a few inches (it is easier to work
with a long end). |
 |
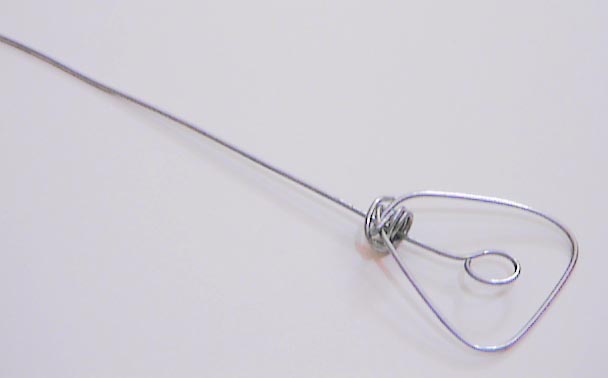
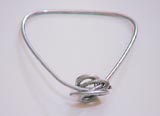
Step 10 - Put the link in the handle - Insert the link
into the handle so that the eye is on the inside of the handle. The link
should spin freely and not have any significant preference in orientation.
If, when the free end of the link is rotated and pulled, the eye of the link
moves closer and further from the handle grip, then either the handle or link
needs some adjustment. The neck of the link can be flattened, and the loop
on the handle can be levelled. There will always be a slight preference,
but it should be less than a wire thickness in size. |
 |
Step 11 - Start winding the free end - Insert the free
end of the link into the ring winder. Start winding the free end, making
sure that the eye formed by the loops of wire on the ring winder are in the
correct orientation to form an 'S' shape with the already formed link
eye. |
 |
Step 12 - Wind to the correct length - Wind the link
wire onto the ring winder until the total length of the handle and link
(including the eye formed on the winder) is only slightly longer than the
correct length. For a chain with two rings between each link, the correct
length is 7.42 inches (7.92 minus the inner diameter of half of the rings
between the links). This is the distance from the outside of the handle
grip to the inside of the far link eye. |
 |
Step 13 - Cut off and form the second eye - Cut the link
and eye off of the ring winder. If there was a lot of extra wire, it is
likely that a few rings can also be made. Clip the wire so that an eye can
be formed in the same manner as when the links are cut from the link jig.
Form the eye and neck. Ideally, the combined link and handle will be the
correct length or a little longer (it is easier to shorten a link than
lengthen it). |
|
Done - The handle is ready to be added to the
chain. |
|
Assembling the Chain |
|---|
| The chain can be assembled as the various links, rings,
handles, and tags are finished. This is more satisfying than waiting until
all of the parts are made, as the progress is more evident.
If the chain is to be hardened, the tags should not be added until after
hardening. |
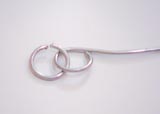 |
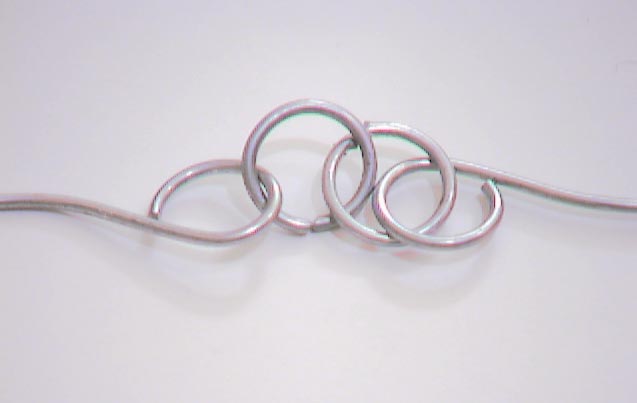
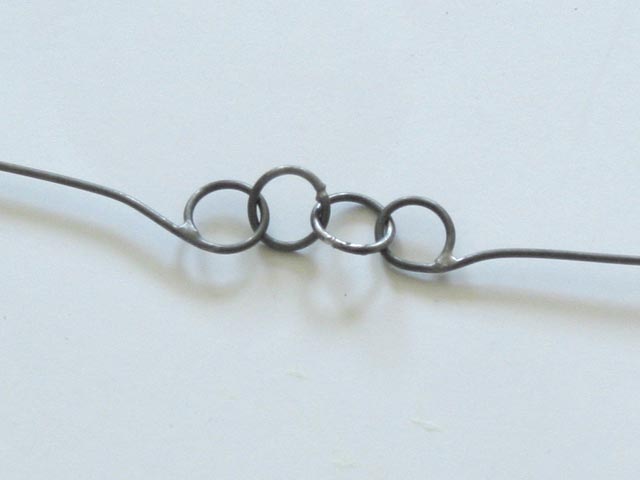
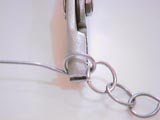
Step 1 - Attach a ring to a link - The links are
attached to each other with the rings. The handle is treated as an ordinary
link for assembly purposes (except, of course, that the handles go at either
end of the chain). Place a ring through the eye of a link. Close the ring
using the pliers, making sure that the gap is small and the wire ends are
lined up. |
 |
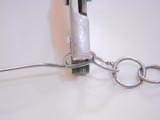
Step 2 - Attach another ring and another link - Put
another ring through the ring that was just added. Before closing the ring,
put the ring through another link. Close the ring as before. |
 |
Step 3 - Shorten the link if necessary - Compare the
link and the associated rings to a ruler to make sure it is the correct
length. It is best to adjust a series of links in a row to reduce the
likelihood of error build-up. I found it easiest to mark a vertical section
of wall for a distance of ten links, then hang the chain from a hook at the
top. This provided a small tension on the chain. I adjusted the links
starting at the top and working my way down.
If a link is too long, it can be shortened by grabbing the back of the eye
with the pliers and rolling the eye toward the center of the link. |
 |
Step 4 - Lengthen the link if necessary - The link can
be lengthened by crushing the eye somewhat. It can also be lengthened by
unrolling the eye (the opposite of the preceding step), then squeezing the
open gap in the eye closed. |
 |
Step 5 - The neck can also be adjusted - The neck can be
flattened to elongate the link or bent more to shorten the link. This is
generally a smaller adjustment than working on the eye.
Continue attaching the links until the entire chain is assembled. If the
chain is to be hardened, it should be done at this time. |
 |
Step 6 - Attach the tags - Attach a tag every ten links.
The tag is attached with another ring. It doesn't matter to which of the two
inter-link rings the tag ring is attached. The tag with 1 point goes at
link 10 and 90, 2 points at 20 and 80, 3 points at 30 and 70, 4 points at 40
and 60, and the round tag at 50. Remember that the handle is a
link. |
|
Done - The chain is complete. The chain should be
verified against a standard to make sure that it is exactly 66 feet in
length. Note that the tension with which the chain is held will change its
length. Therefore, make sure that when verifying the chain length the
tension is the same as that which will be used in the field. |
|
Hardening (optional) |
|---|
| Because the chain is made from mild steel, it will have a
tendency to bend under use. This can be reduced by hardening the steel. To
harden steel, the steel needs to be heated to 1600 degrees Fahrenheit, then
quenched in water. This makes the steel hard, but brittle. To reduce the
brittleness, the steel is then tempered by raising it to 400 degrees
Fahrenheit for an hour or so, and then letting it cool normally.
If the steel does not have enough carbon in it, it will not harden. Also,
if the steel is galvanized, the zinc will melt or vaporize in the hardening
process. Historically, many chains were hardened.
I have not hardened my chain. |
|
Brazing (optional) |
|---|
Historically, some chains had the gaps in the link eyes
and rings brazed closed. The chains I have examined look like they were
soldered with a lead or silver solder.
Initially, I didn't braze my chain. However, once I took the chain into
the field, I found that it would occasionally come apart, especially when
dragging it through brush. While one could be careful and still use the
chain, I wanted to be able to use it properly, so I decided to braze
it. |
| Brazing Materials |
 |
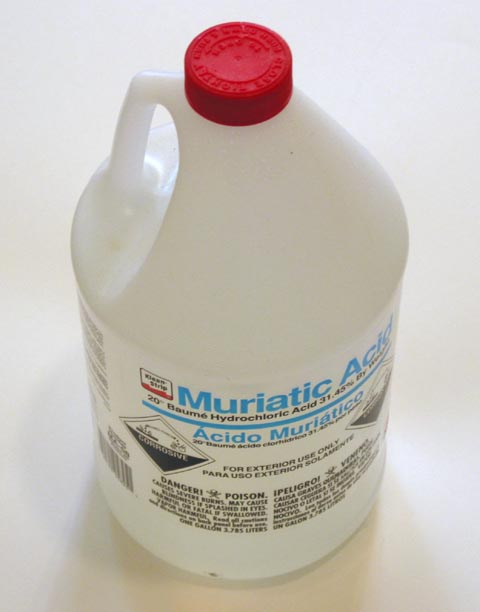
Muriatic Acid - Because I started with galvanized wire, I needed
to remove the zinc before I could braze the chain. Muriatic acid does this
quite efficiently, though it is quite toxic. Be sure to follow all the
proper safety guidelines when handling the acid. |
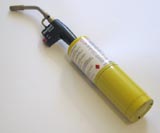 |
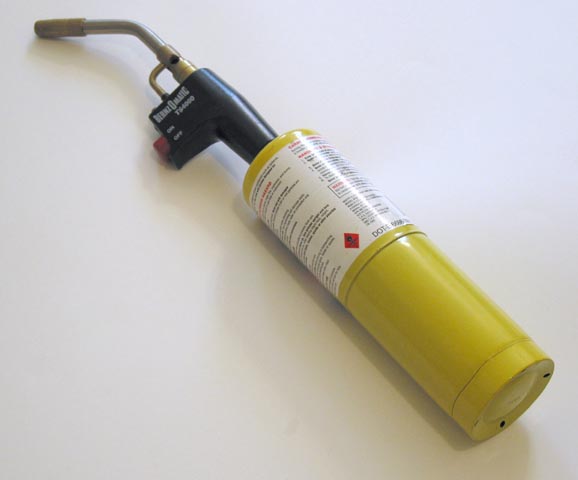
Mapp Gas Torch - I used a mapp gas torch to heat the chain to
braze it. This is similar to propane, but burns hotter. Propane would
probably have been sufficient. |
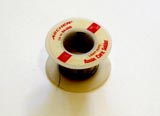 |
Solder - I used a lead/tin solder, primarily because it was
available. The solder should be roughly the thickness of the wire used for
the chain. Very thick solder doesn't work well, and thin solder is more
annoying to apply. |
Water - (not shown) - For quenching the brazed links and
for rinsing the muriatic acid off of the links. |
| Brazing Tools |
|
Pliers - In addition to the common-sense safety items, I used a
pair of pliers for manipulating the hot links. This wasn't often necessary,
as the neighboring links didn't heat up and could be used to move the working
area. |
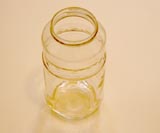 |
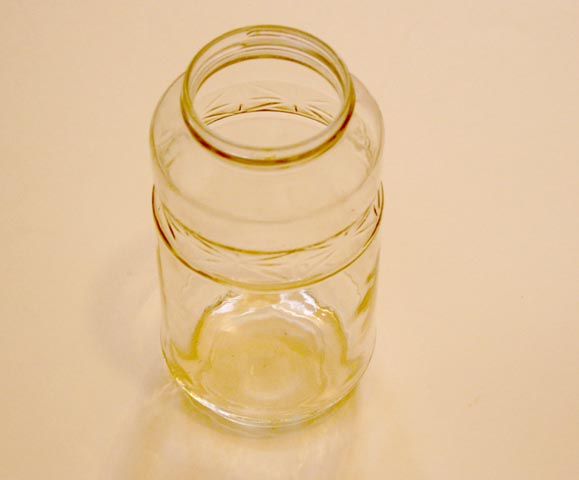
Glass Jar - I used a glass jar for the muriatic acid. This kept
the open surface area to a minimum, but still allowed easy immersion of the
areas to be brazed. |
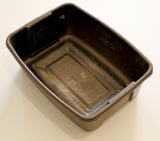 |
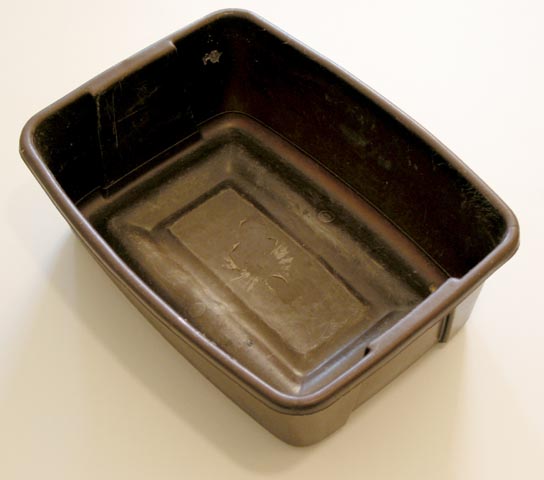
Bucket - For holding the rinse/quench water. |
Grill - (not shown) - As a work surface, I used a
barbeque grill. There may be a better choice, as I ended up splashing some
of the solder on the grill, but at least the grill was not flammable in any
manner, and allowed the placement of very hot items on it. |
| Brazing Process |
| Note: I brazed the chain outside, away from my
camera equipment. Therefore, the following pictures are a recreation of the
brazing process. The pictures are representative of what needs to be done,
but do not have the same exactness as the rest of the description. |
 |
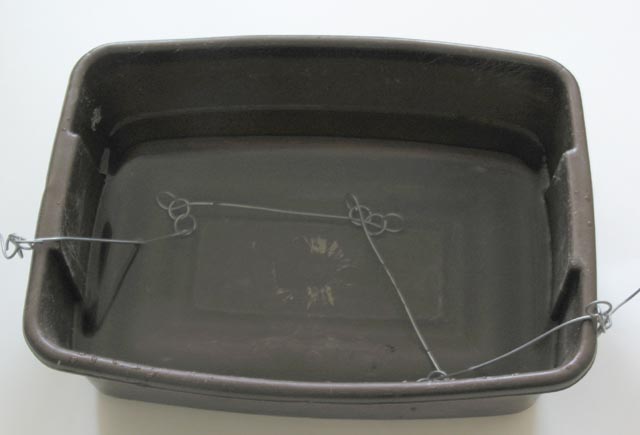
Step 1 - Remove the Zinc - Put the junction between two
links into the jar of muriatic acid. Hydrogen gas bubbles off from the links
and rings as the acid reacts with the zinc. After many links have been done,
the acid will become tinged with suspended zinc chloride. I made sure that
at least half the length of the link was submerged in the acid, so that the
entire chain would be free from zinc when I was complete.
The brass tags are not substantially affected by the muriatic acid, so I
did not remove them prior to brazing. This allowed the rings holding on the
tags to also be brazed. Also, I dipped the handles into the muriatic acid;
this was solely to obtain a uniform appearance to the final chain. |
 |
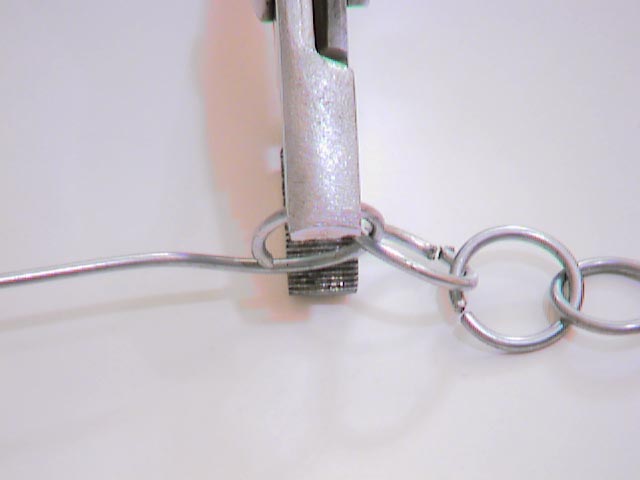
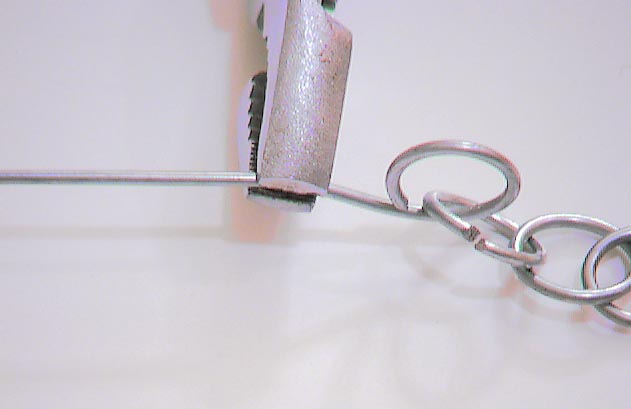
Step 2 - Braze - Use the torch to heat the link eyes and
rings. When the wire is hot enough, touch it with the solder. When this is
done optimally, the solder melts and flows to fill the slight gap between the
link eye and the link shaft or the gap between the ends of the rings.
Sometimes I had to reheat the wire and reapply the solder. |
 |
Step 3 - Rinse and quench - Put the brazed links into
the bucket of water. This stops the acid from further etching the steel
wire, and also hardens the solder. |
 |
Step 4 - Inspect the brazed points - Check each braze
point carefully to ensure that it is fully joined and reasonably strong. If
there is a problem, braze the area again. Repeat all of the steps for all of
the link eyes and all of the rings. |
|
Done - The chain can now be used vigorously. It is
strong enough that I and an assistant can carry it over obstacles by keeping
enough tension on the two ends.
I rinsed the entire chain once more, then oiled it lightly with WD-40 to
keep it from rusting. |
|
Completed Chain |
|---|
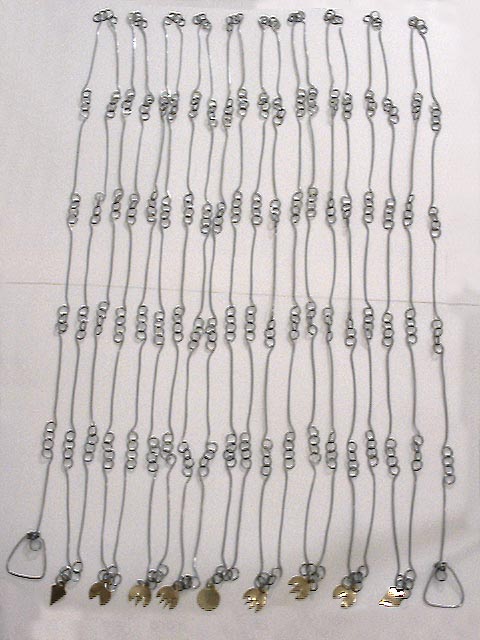
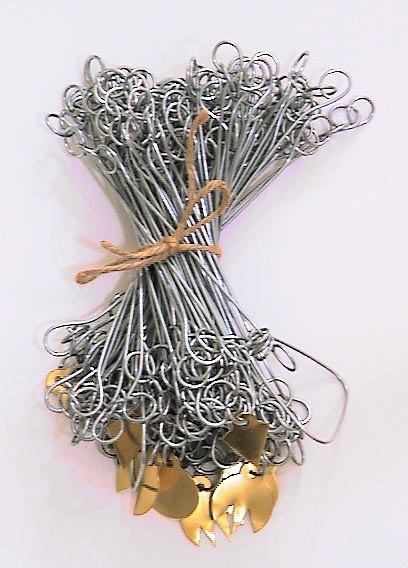
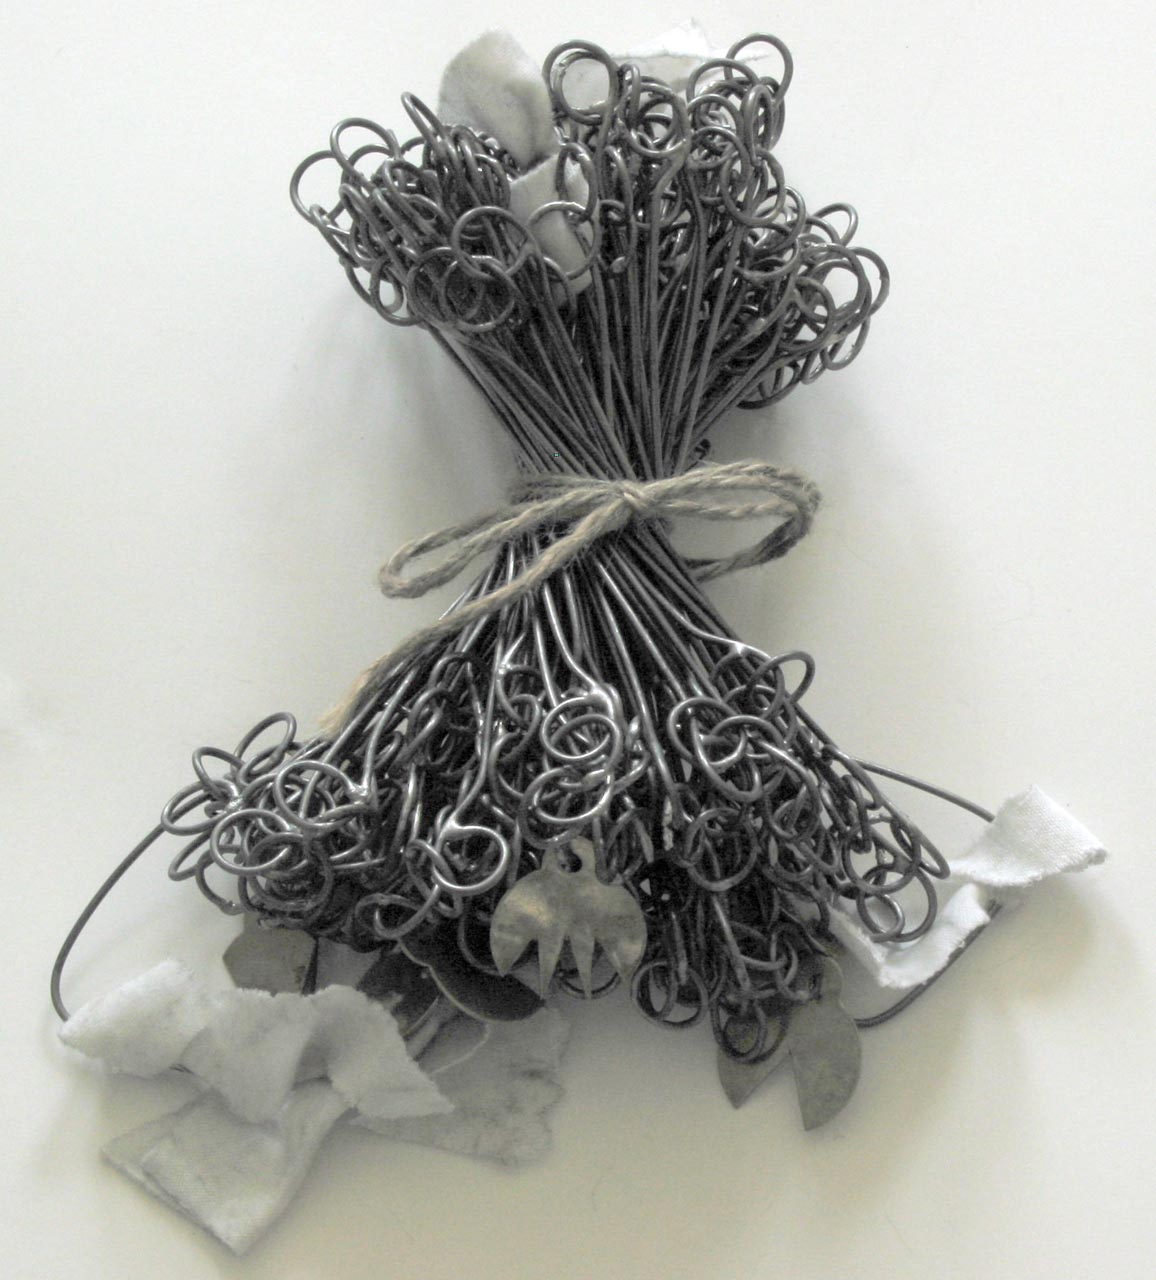
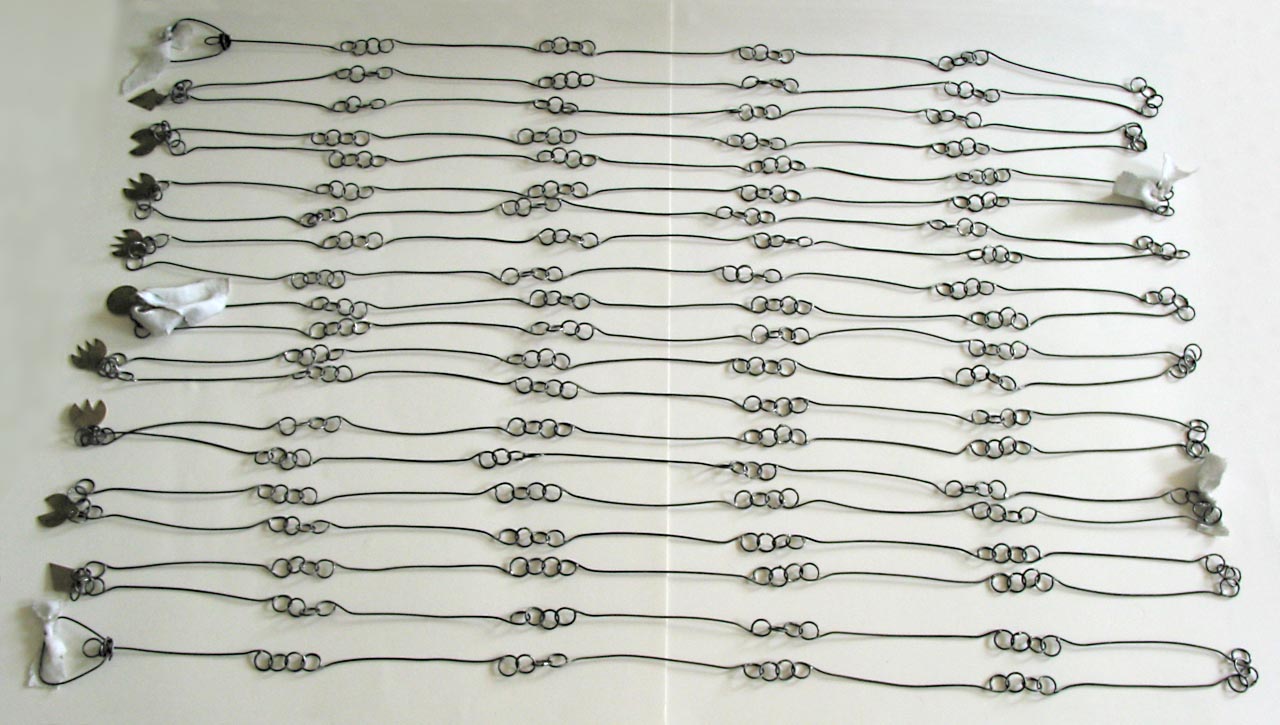
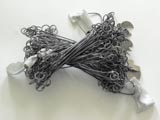
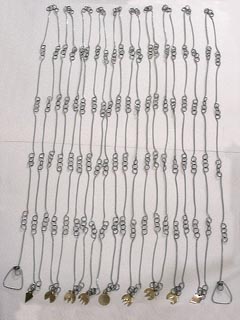
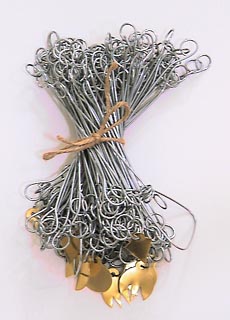
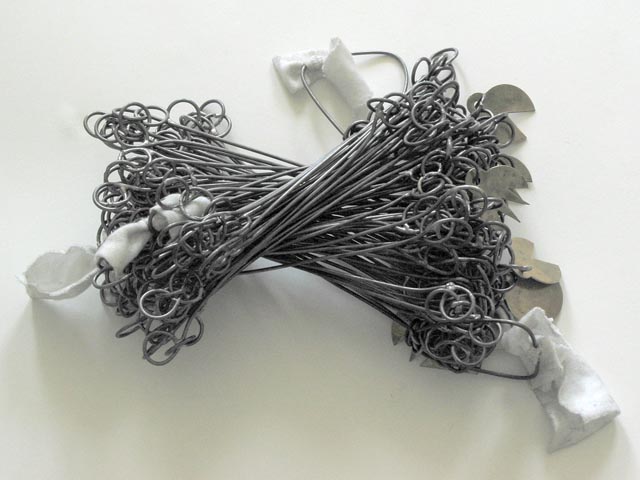
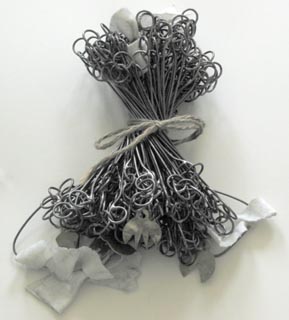
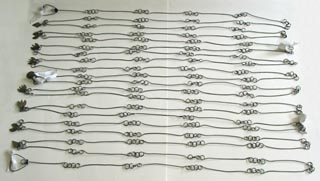
| Here are some photographs of the completed chain. The
first three photographs are of the chain prior to brazing. The rest of the
photographs are of the chain after it has been brazed and has been used in
the field several times. I tied strips of white cloth to the handles and
every 25 links to make the chain easier to see; otherwise it practically
vanishes when placed on the ground. |
 |
 |
 |
 |
 |
 |
|